Day 3 : How to use Plane Tracking in AR and place objects using Unity
In this tutorial we will learn to build an Augmented reality app by identifying the planes in our environment. We will do this for both the platforms iOS and Android using Raycasting and AR foundation.
This is part of a 30 day sprint where we try to publish 30 projects in 30 days, this means building full projects from scratch. Double checking the code, writing the tutorial and then posting it . If there are any typos do let us know and I hope you enjoy this tutorial and project.
Introduction
In a previous tutorial here, we learned to build an AR App and identifying planes in our environment. In this article, we’ll learn to place objects in AR on a detected plane.
You will be able to tap on a plane and create an object on that position on the plane. Finally, we will spawn a simple cube, but it can be any other object as well.

Download Source Code
Getting Started
Prerequisites
Follow along from the Day 1 article here.
- Unity 2019.2.18f1
- AR Foundation 2.0.2
- Android or iOS device
- Basic C# programming and understanding skills
This project will work on both Android and iOS, as we have already seen how to do that. For more info on how to make a Universal AR App, you can read about it here.
We’ll be using Raycasting to identify and select the desired planes. We talked about raycasting more in the Plane Area Calculation tutorial from here. Raycasting is creating an imaginary line originating at a point with a specific direction. If the Ray hits any collider or a physics object like a Rigidbody, we can fetch information about the Hit object.
However, AR Foundation provides its own Raycasting method called AR Raycast Manager which we have already set up before. We’ll leverage this class as it provides just what we require for this project. Our Application will work as follows.
We will have a CubeManager class that will detect the touches on the screen and Raycast against the detected planes in the scene. When a plane is identified by the ray, we will fetch the position of where the ray hits the plane and create our new Cube gameobject from a prefab there. If we tap on the cube again, we delete the cube.
Implementation
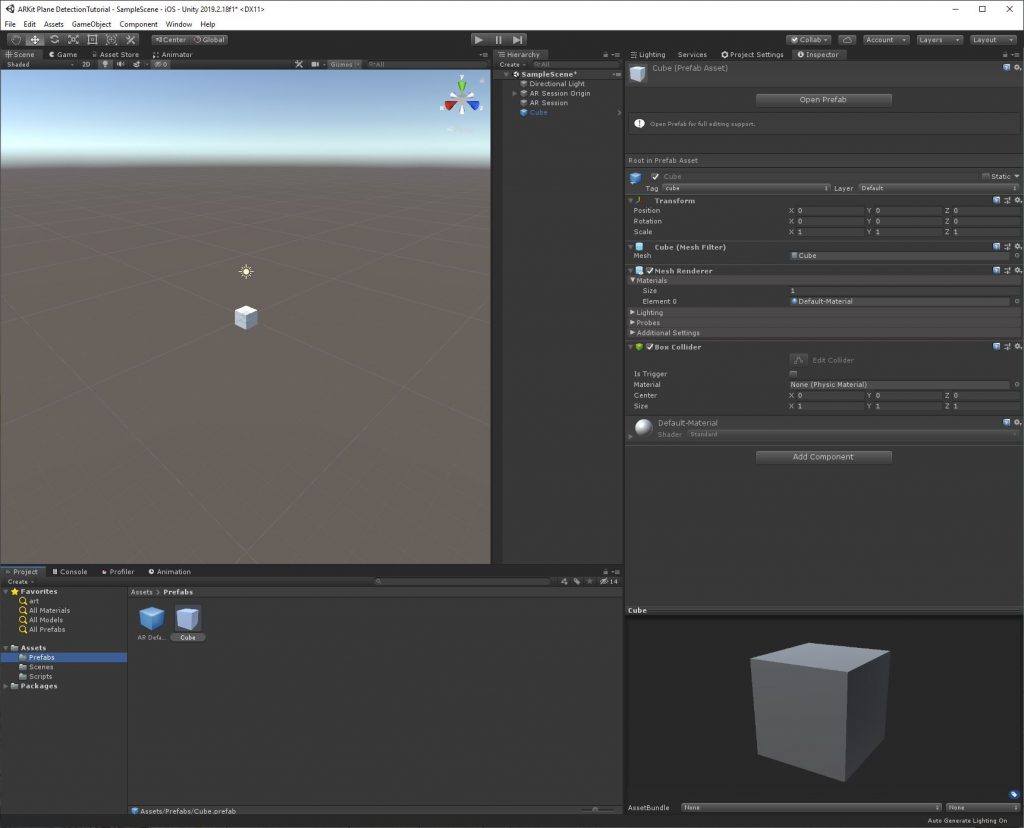
First, Let’s create our Cube prefab. Right-click in the Hierarchy -> 3D object -> Cube. This will create a new Cube gameobject in the scene.
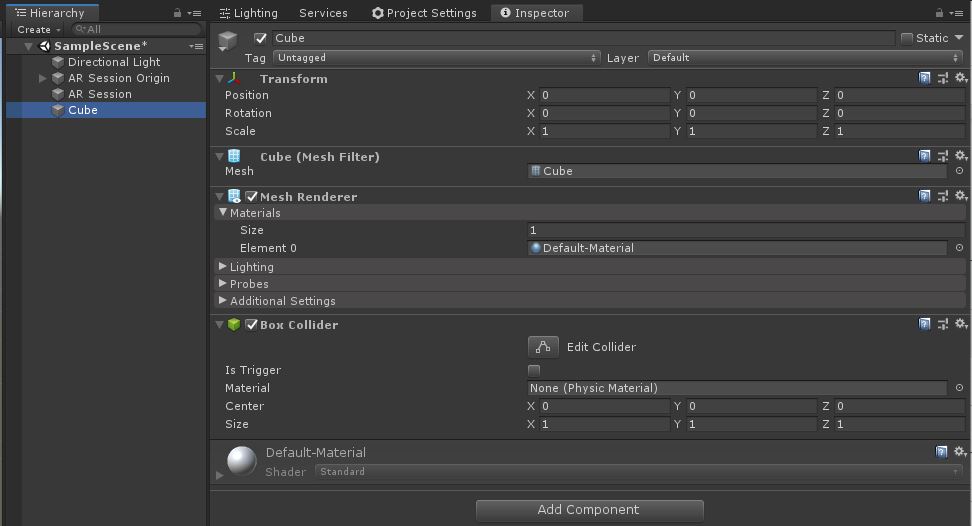
Since we want to delete a cube when we tap on the cube, we want to be able to identify uniquely that it is our cube prefab, we can do this in a number of ways, but the simple and effective method is to tag our Cube prefab with a string. When we Raycast against the cube, we can then compare the tag and find out if it’s a cube that we tapped on.
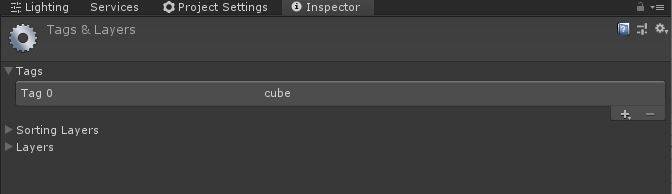
Unity will have a few default tags, but we want to create a new one and assign it to the cube gameobject first. Once the cube is selected, In the Inspector window there is a Tag property on the top left.
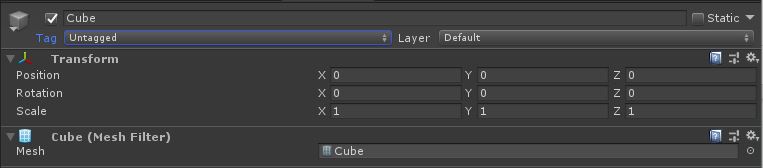
Select that and select the Add Tag on the bottom of the shown list of tags. Unity will open the Tags and Layers page in the Inspector Window.
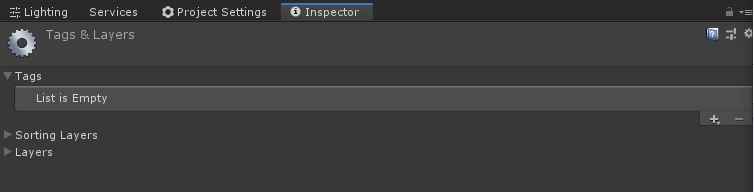
Click on the “+” icon under the Tags.
Enter the name as “cube” (smalls) and save. It should look as follows.
Select the “cube” tag in the Cube gameobjects Inspector. Now, to make a prefab out of this Cube gameobject, drag it and drop it on the Prefabs folder in the Project window. You can now delete the Cube gameobject from the Hierarchy.
Next, Let’s set up our CubeManager class. We’ll create a new gameobject by right click in the Hierarchy > Create Empty -> Rename it to CubeManager.

To this gameobject, we’ll create and add a new c# script. Add Component on the gameobjects Inspector -> type in CubeManager -> New script -> Create and Add. Unity will now create a new script called CubeManager.cs in the projects root folder – Assets. You can move this into a new folder called Scripts for better project structure management.
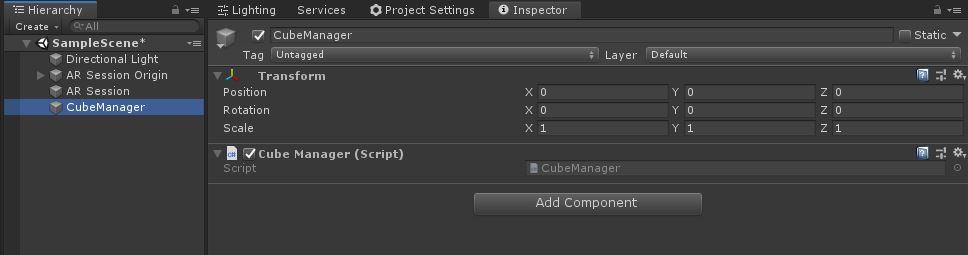
Double click on the CubeManager script and it should open up with Visual Studio.
We need references to the ARRaycastManager component and the cube prefab. So we create two public fields and will assign them from the Inspector.
public ARRaycastManager arRaycastManager;
public GameObject cubePrefab;
Since we want to check for touches on the screen. We’ll use the Input class for this. And we check for touches every frame, we do it inside the Update method.
if (Input.touchCount > 0)
{
     var touch = Input.GetTouch(0);
     if (touch.phase == TouchPhase.Ended)
     {
          if (Input.touchCount == 1)
          {
          }
     }
}
Once we have the current touch and the touchCount meaning the number of fingers, on the screen is just 1, we can perform our Raycast.
We’ll be performing two types of Raycast. One is for detecting planes, second is detecting the cubes.
First, the planes, for which we’ll use ARRaycastManager. The Raycast method of this class needs a list of ARRaycastHit’s which store the information about the objects we hit.
private List<ARRaycastHit> arRaycastHits = new List<ARRaycastHit>();Now we can Raycast from our touch.position on the screen. If the ray hits anything, the method will return true and hits are stored in the arRaycastHits variable. The hits are sorted by distance and hence the first item in the list will be the shortest one.
if(arRaycastManager.Raycast(touch.position, arRaycastHits)) { }Let’s also create Helper methods to create and destroy cubes.
private void CreateCube(Vector3 position)
{
     Instantiate(cubePrefab, position, Quaternion.identity);
}

private void DeleteCube(GameObject cubeObject)
{
     Destroy(cubeObject);
}
Now, we can call them from inside our Raycast.
//Raycast Planes                    if(arRaycastManager.Raycast(touch.position, arRaycastHits))                    {
     var pose = arRaycastHits[0].pose;
     CreateCube(pose.position);
     return;
}
Next, we want to detect if a Raycast hit a cube. We’ll use Physics.Raycast for this.
Let’s create a Ray from our touch.position leading into our scene into world space.
Ray ray = Camera.main.ScreenPointToRay(touch.position);We can now Raycast against this Ray and from the Hit result compare the tag of the cube to what we defined. If the tag matches, we call the DeleteCube method.
if (Physics.Raycast(ray, out RaycastHit hit))
{
if(hit.collider.tag == "cube")
{
DeleteCube(hit.collider.gameObject);
}
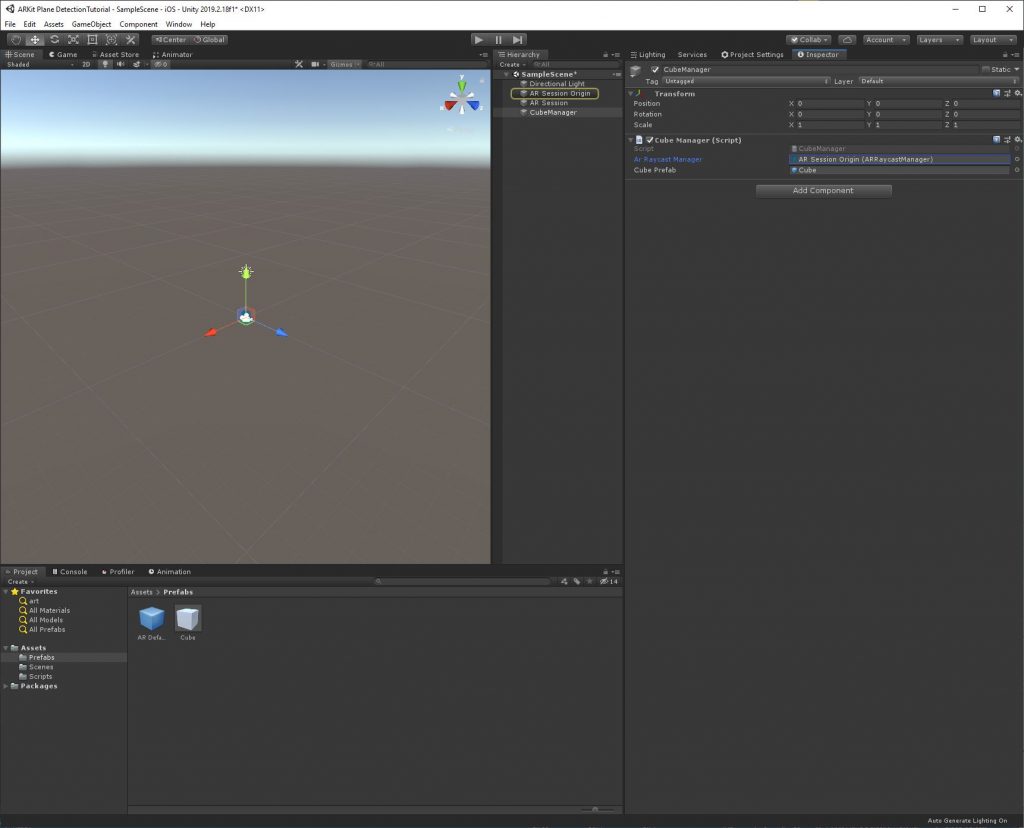
}Now, save the script and head back to unity. After that, once the script is compiled, you will see the public fields in the CubeManager’s Inspector.
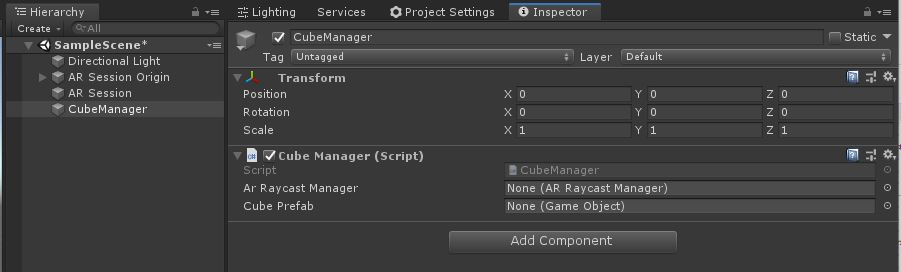
Assign the AR Raycast Manager from the AR Session Origin gameobject and the cube prefab from the project view.

That’s it!
Now build the project, deploy it onto your target device and test away!
[…] launch experience. We’ll use the same template as the placing objects on planes tutorial from here, and place a Rocket in AR! The rocket will then launch itself into the […]
Hello, i am trying to follow this tutorial but I couldn’t find the tutorial pages after this one, can you please help?
Hi, I’ve got this project working. However, I cannot delete the cubes I create when deployed on my phone.
I’ve tried shuffling the code around but it hasn’t seemed to have helped.
Do you know where I could of gone wrong?
Thanks