Day 11 : Creating a Rocket Launch AR Experience with AR Foundation and Unity.
In this article, we will build an AR Rocket launch experience. We’ll use the same template as the placing objects on planes tutorial from here, and place a Rocket in AR! The rocket will then launch itself into the sky.
This is part of a 30 day sprint where we try to publish 30 projects in 30 days, this means building full projects from scratch. Double checking the code, writing the tutorial and then posting it . If there are any typos do let us know and I hope you enjoy this tutorial and project.
Getting Started
If you want to start from the beginning then follow the tutorial linked above and have the project setup. You can also follow along if you want to integrate this with your own app.
I’m going to build this project for iOS but this also works on android.
Prerequisites
- Unity 2019.2.18f1
- Programming skills
- Understanding of Particle Systems within Unity.

Download Source Code
Implementation
The process will be as follows. We will create a rocket prefab from an asset from the asset store. For the rocket exhaust effects, we will use particle systems to simulate the fire and the smoke.
Then, we’ll spawn the rocket on a detected AR Plane which will launch itself.
Particle Systems
A particle system is a graphics technique that basically simulates physical effects like Fire, smoke, weather, and explosions. Each particle in a system is a single point in space. A fire can be represented by thousands of these individual particles. Typical rendering methods use polygons with straight edges, but representation using particle systems creates a fuzzy shape like a fire. These are also called fuzzy objects.
Unity provides two ways of creating particle systems. First is the built-in shuriken particle system and second, the Visual Effect Graph. We’ll use the built-in shuriken particle system. The visual effect graph can be used to create Hollywood grade VFX within unity which might be overkill for this purpose. If you want me to cover the Visual effect graph in a separate article, please comment below and let me know.
You can read more about unity’s particle systems here.
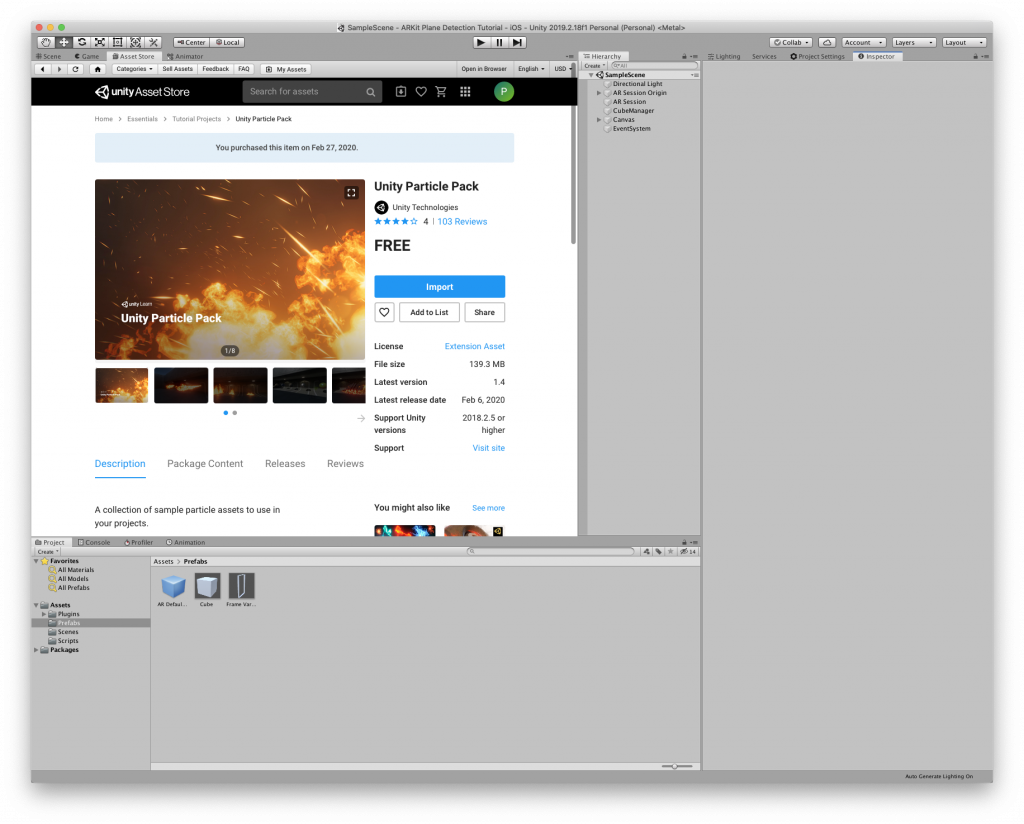
For this tutorial, we’ll use the particle system pack collection from the asset store from here.
This asset from the Unity asset store has the textures that we can use to create our particles, instead of creating them ourselves using photoshop. Although if you want some custom shape, you can make them in photoshop and import them into unity.
Open the asset in unity’s asset store window -> asset store and click on download and import.
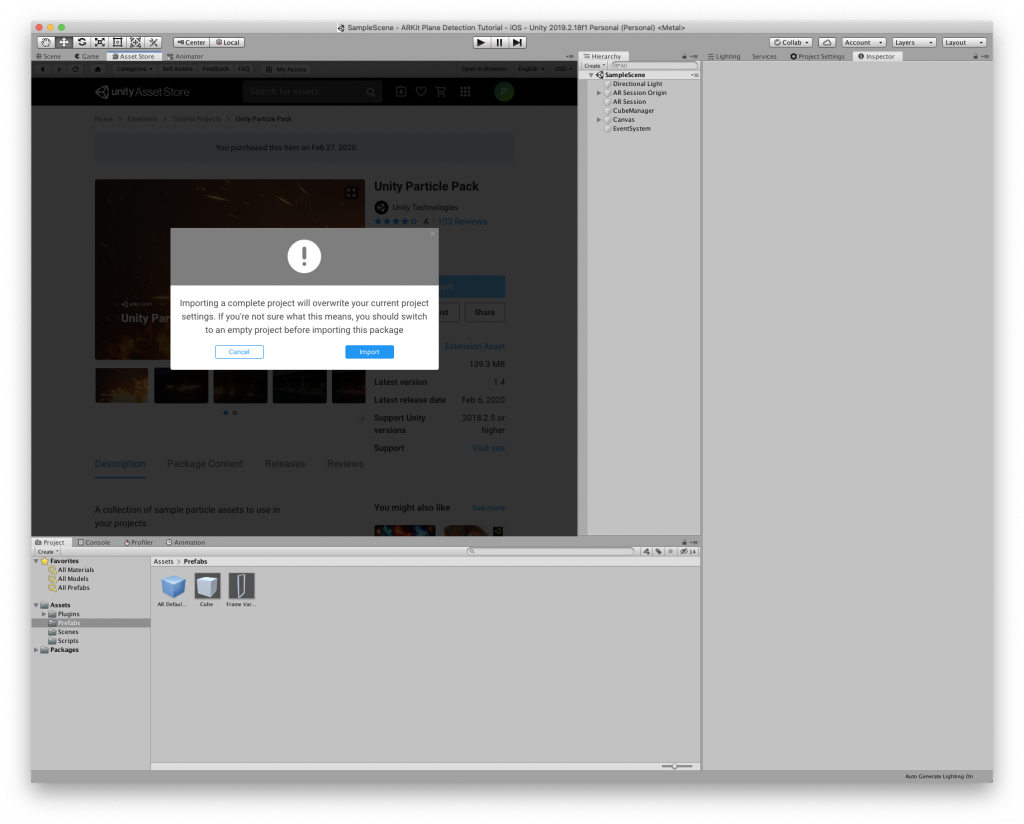
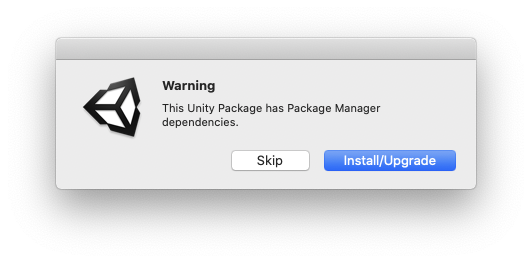
Import it and upgrade the asset if prompted.
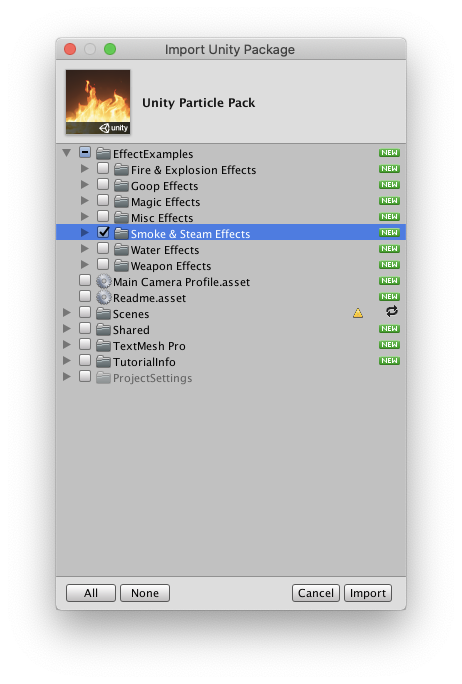
Now, this asset contains lots more effects that you’re free to explore and experiment with. But for the sake of this article, we’ll only select the Smoke and Steam effects which contain the fire and smoke textures. Rest can be ignored as it makes the project size bigger for the readers to download. Select the required ones and click import.
Rocket Model
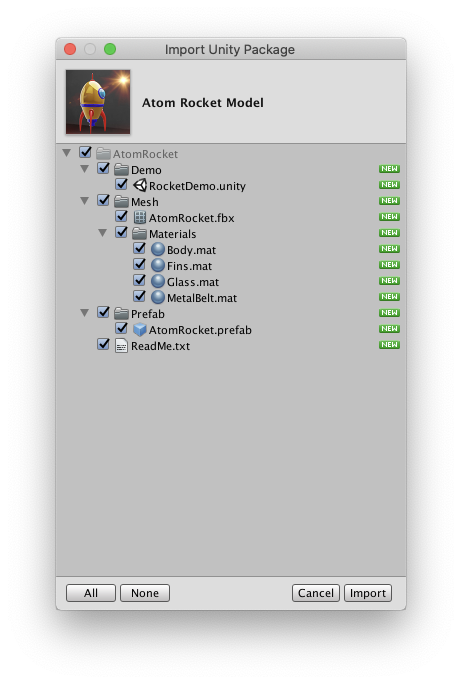
For the rocket 3D model, you can use any model you like. I’m using the Atom Rocket asset from the Asset store which is already configured as a prefab from its .FBX file. Get the asset here.
Once opened in Unity, download and import it.

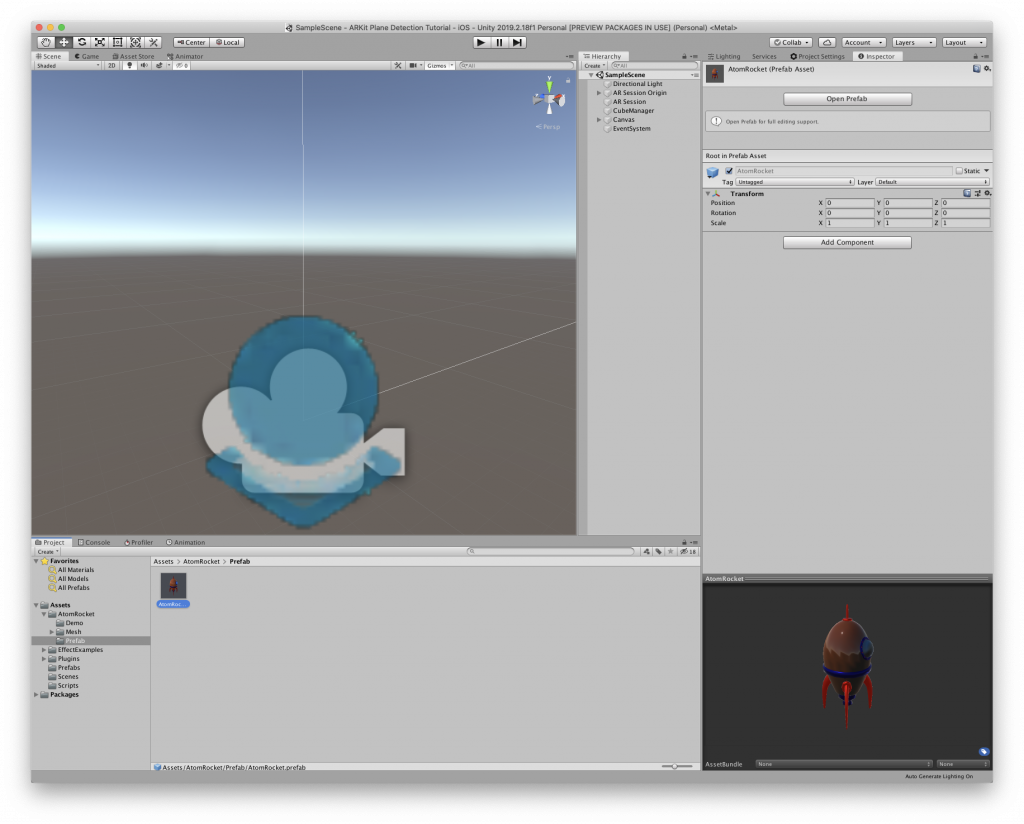
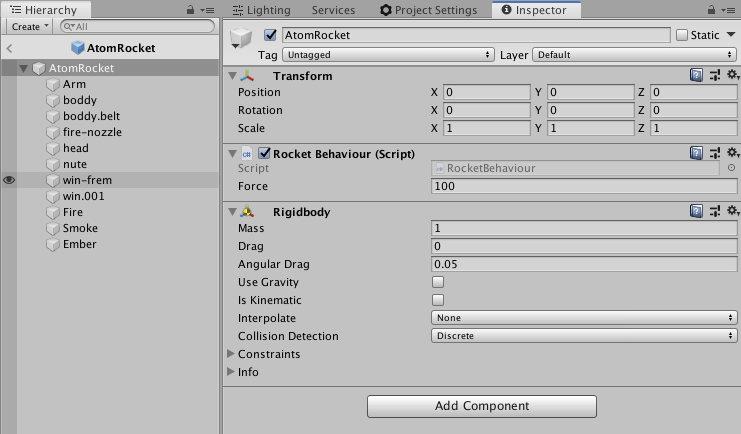
Select the prefab under Assets -> AtomRocket -> Prefabs -> AtomRocket.prefab and click on Open Prefab in the inspector.
Now, let’s add the Particle systems to our rocket model to create the exhaust fire and smoke effects.
Creating the Particle Systems
Fire Particles
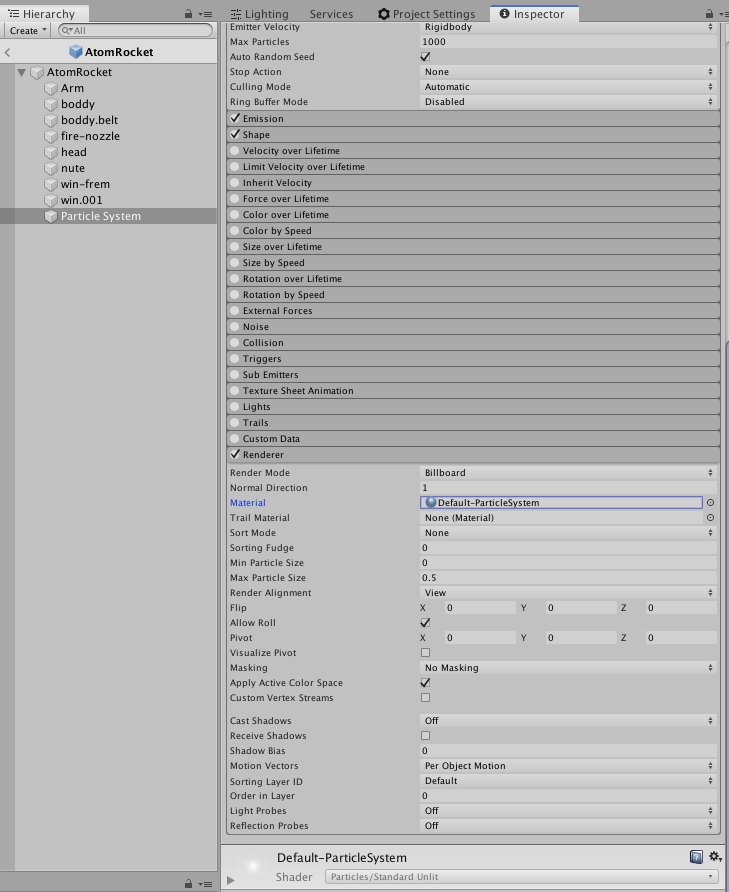
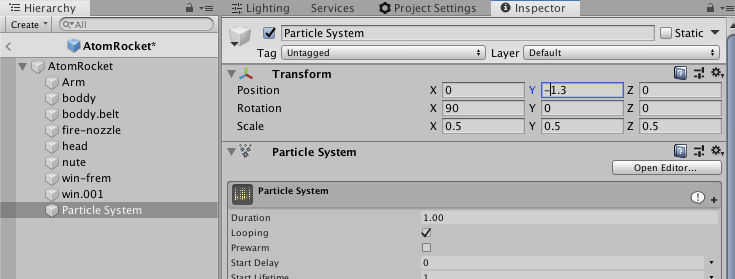
We can create a new particle system under the Atomrocket prefab by right-clicking in the Hierarchy -> Effects -> Particle System

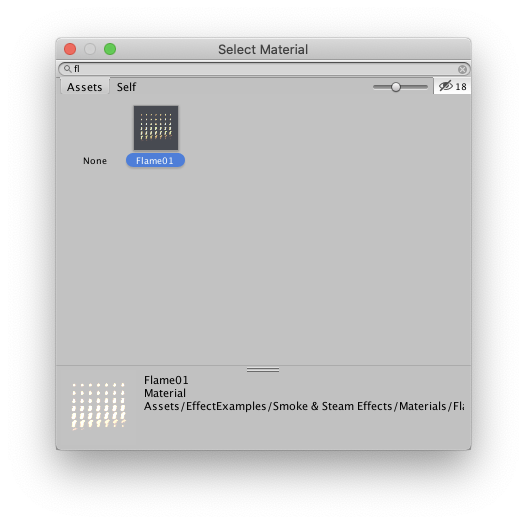
Select it, in the Inspector window you will find its properties. First, we set the Renderer property to a Fire texture. Select the Material field. Search for Frame01 in the select material window and select it. This article will now use this material and its texture for each of its particles.
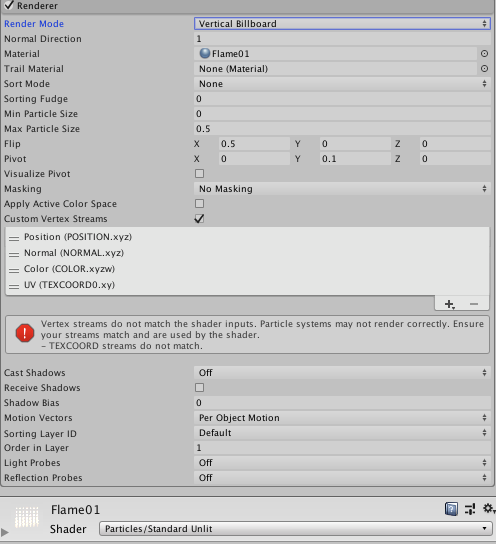
Set the following renderer properties and also turn on Texture Sheet animation with size 7 and 7.
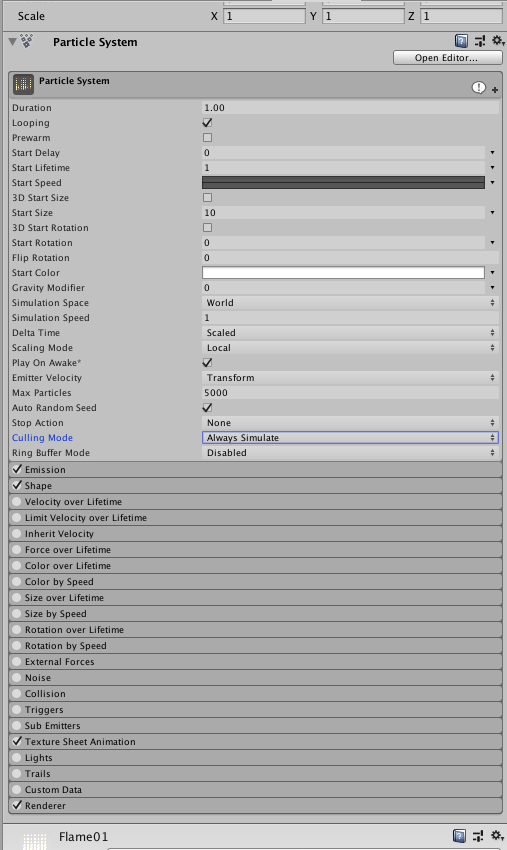
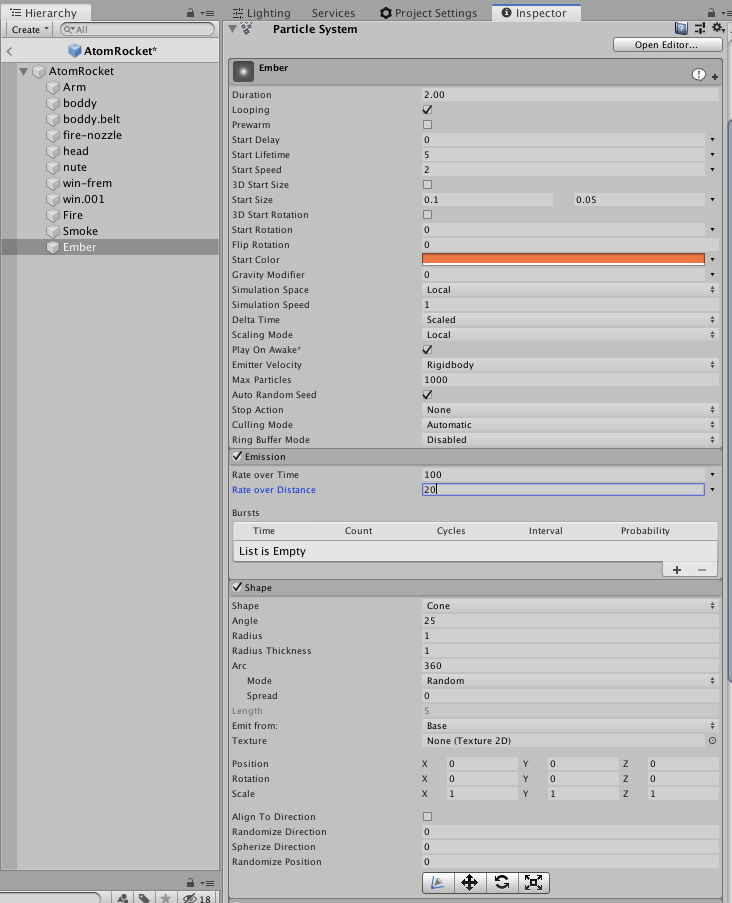
Next set the Particle system properties as follows with the start speed field as Curve
Set the emission and shape property as follows

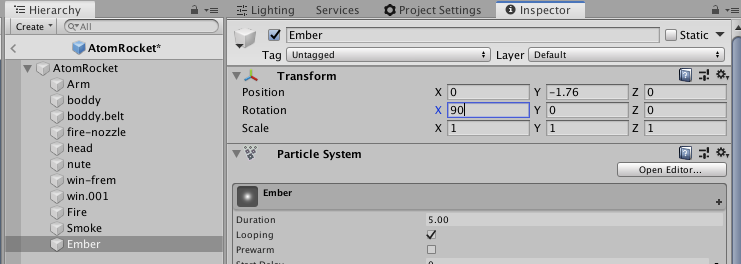
Now set its transform to face downwards and the position to the end of the exhaust nozzle.
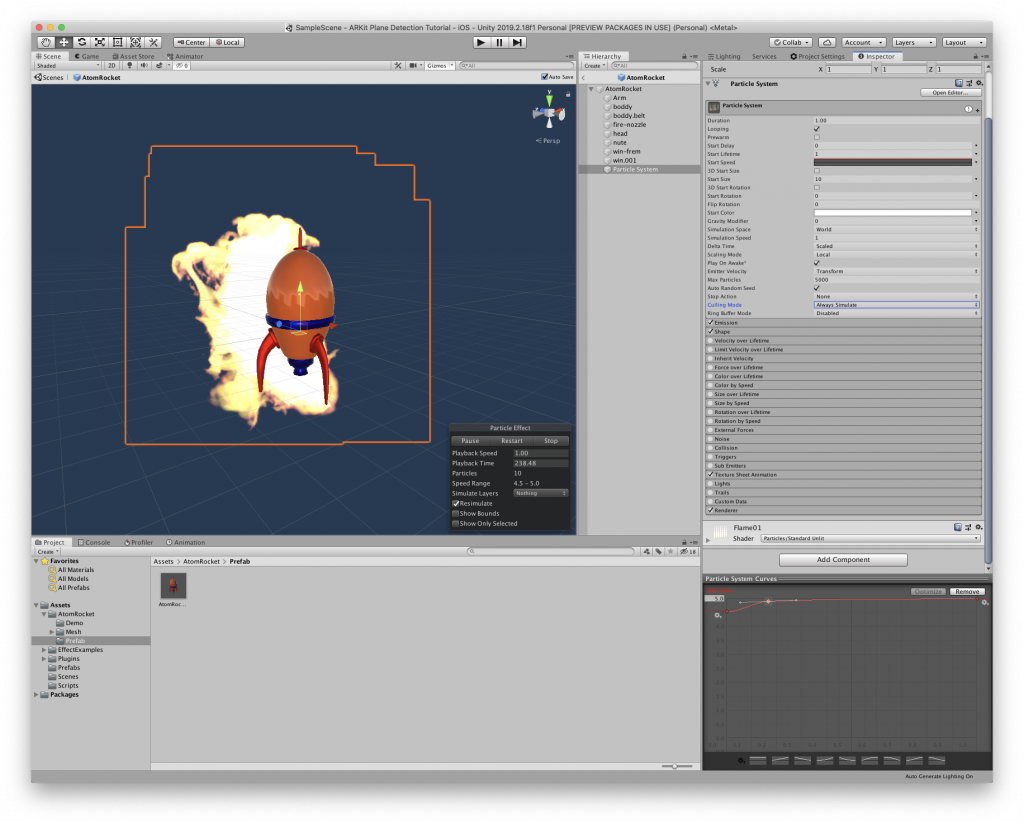
The fire effect will now start to look like this

Rename this gameobject to Fire.
Smoke Particles
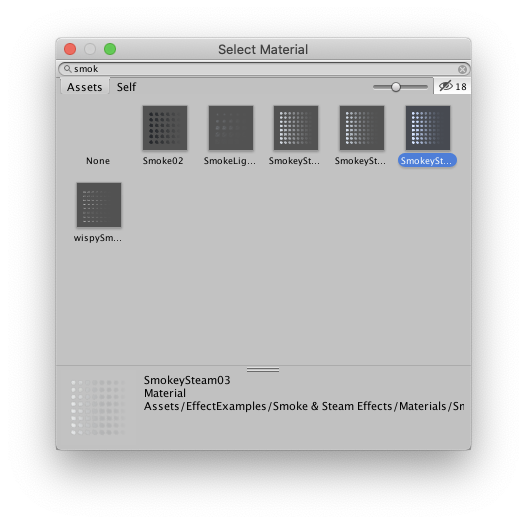
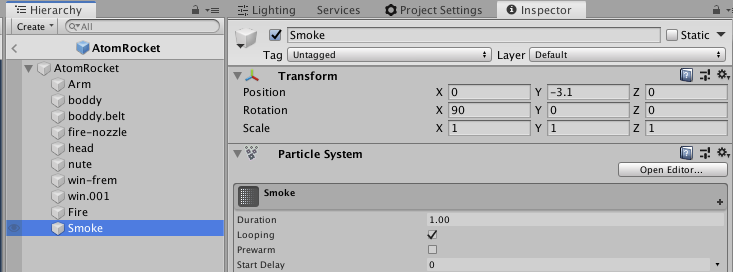
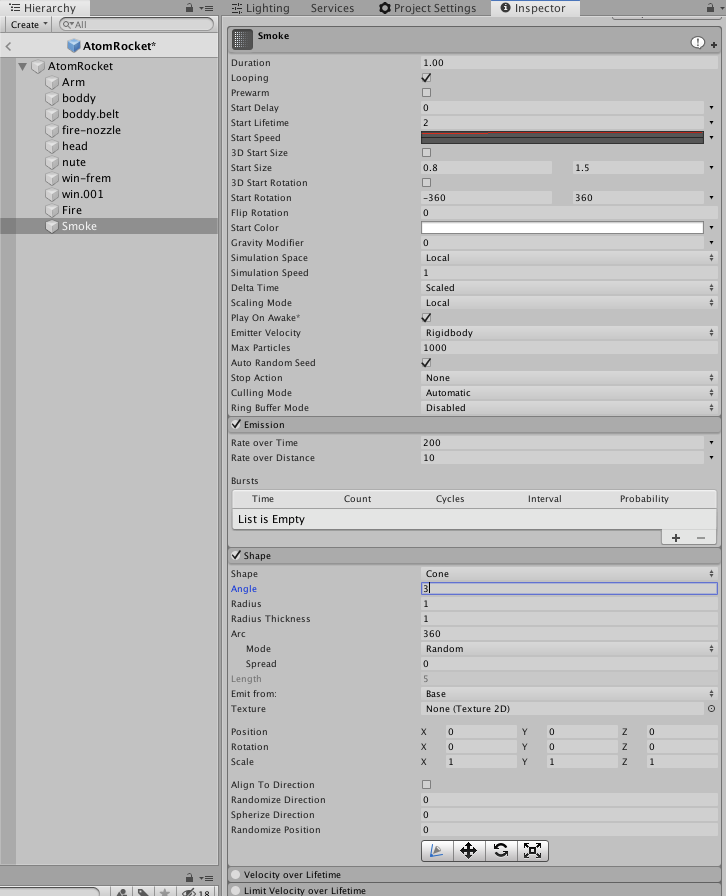
Create another particle system and name it Smoke. Select the material field of its renderer property and set it to SmokeySteam03.mat
[23]
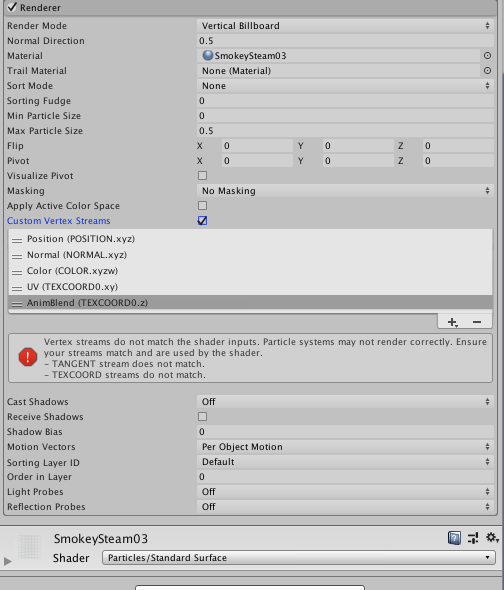
These are the full Renderer property config
Set its transform to the exhaust location and pointing downward
Set its Particle System main property as follows with the start speed set to a curve defined below. Basically, the curve defines the speed at which the particles move at over their lifetime.
Set its emission and shape property as follows. The shape just as the fire particles will be a cone.
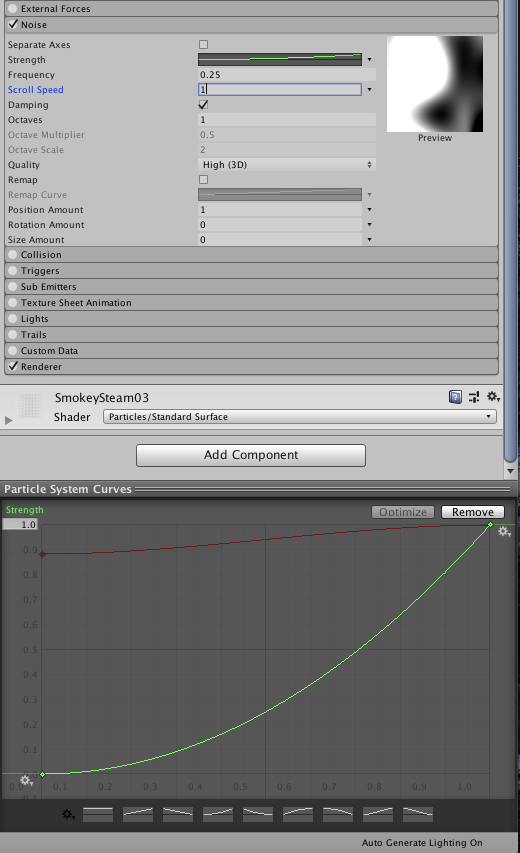
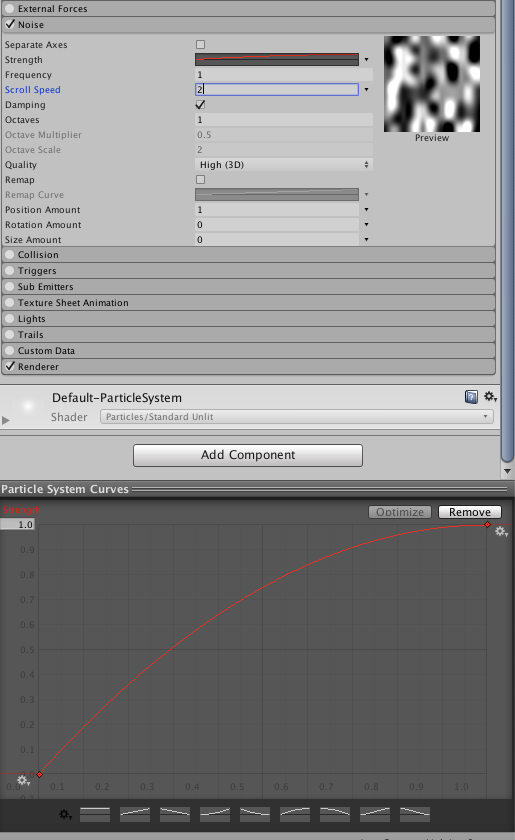
We’ll add some noise which basically adds some turbulence to the particles whose parameters can be defined. The noise property will also show the preview of the noise grain simulation as its fields are modified. Use the strength curve as defined below.
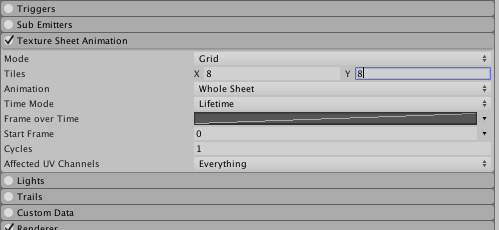
Turn on texture sheet animation with these properties
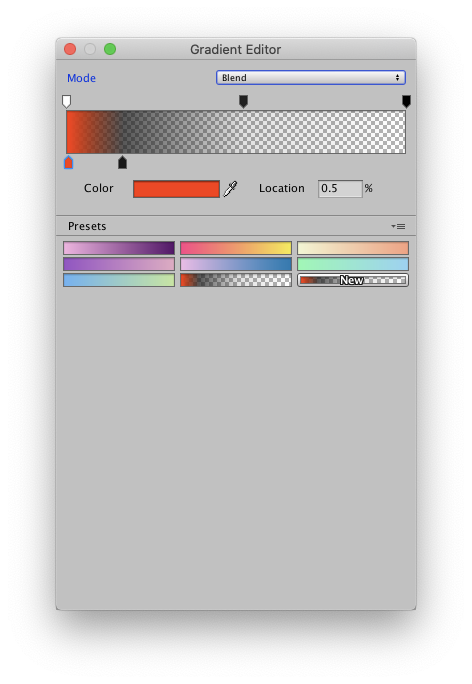
Fiinally, enable color over time and use the following gradient. The source has this red to transparent gray gradient and others that this article uses already setup.
Ember Particles
This is optional, but I added this for some zing to the end result.

Use the following noise curve.
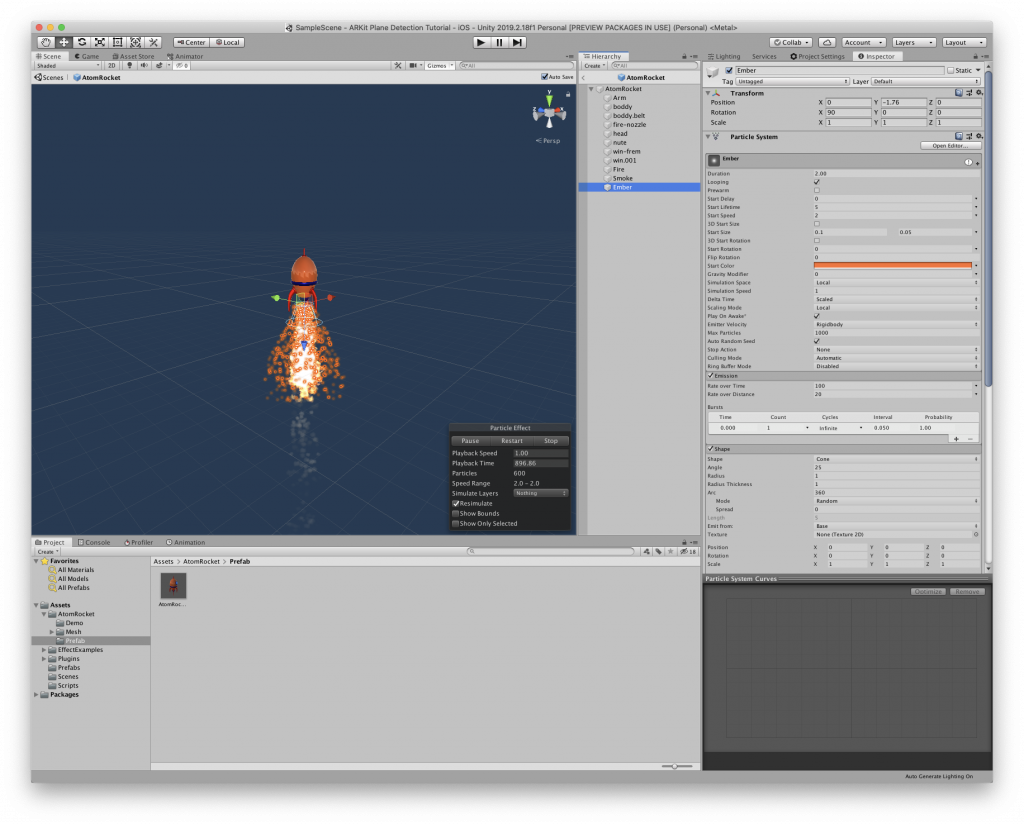
This is what the ember will look like, minus the highlight effect in the editor.

Total effects should now look like this.

Scene Changes
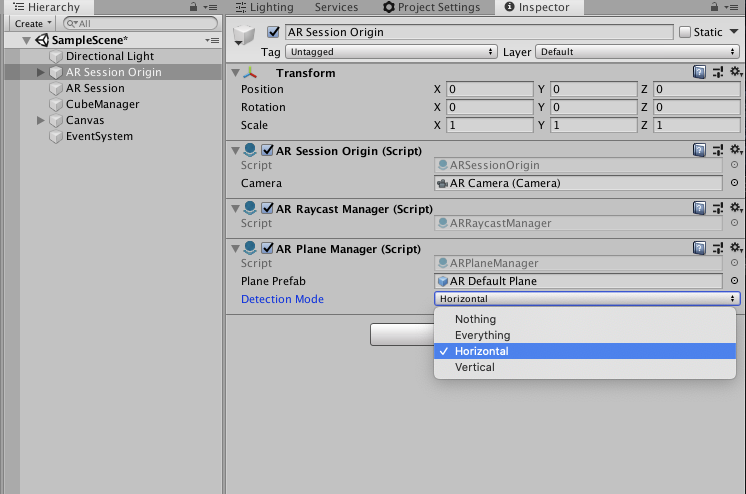
We’ll modify the AR Plane Manager component of the AR Session Origin gameobject to only detect horizontal planes since we want the rocket to spawn vertically on the ground.
Rocket Behaviour
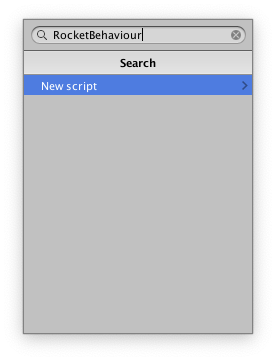
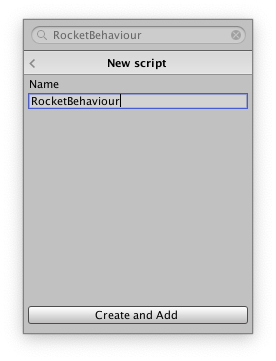
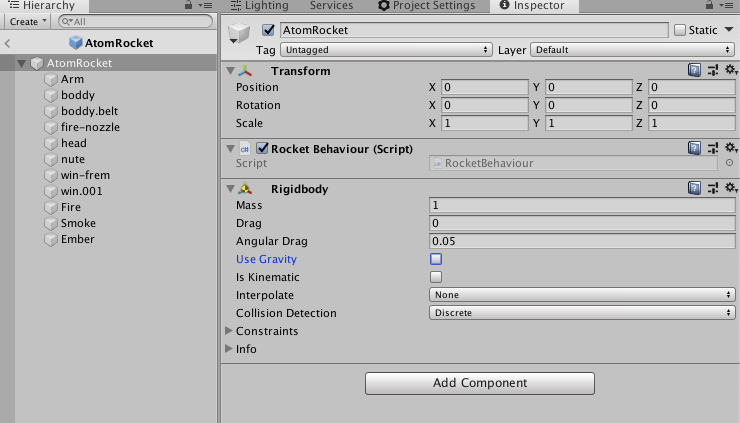
Let’s create a new script on our AtomRocket prefab -> Add Component -> RocketBehaviour -> Create and Add…
Next, add a Rigidbody component to the prefab. Rigidbody is how physics simulations work in unity. You can read more about Rigidbody mechanics here. We’ll use this Rigidbody to apply a force-acceleration to our rocket in its vertical direction.
Lets modify our script as follows.
using System.Collections;
using System.Collections.Generic;
using UnityEngine;

public class RocketBehaviour : MonoBehaviour
{
    private Rigidbody thisRigidbody;
    private bool activate;

    public int force = 100;

    // Start is called before the first frame update
    void Awake()
    {
        thisRigidbody = GetComponent<Rigidbody>();
        StartCoroutine(LaunchRocket());
    }

    private IEnumerator LaunchRocket()
    {
        yield return new WaitForSeconds(3f);
        activate = true;
    }

    private void FixedUpdate()
    {
        if (activate)
        {
            thisRigidbody.AddForce(Vector3.up * Time.deltaTime * force, ForceMode.Acceleration);
        }
    }
}
In Awake() we’ll get the Rigidbody component reference attached and wait 3 seconds in the LaunchRocket coroutine before the rocket fires off.
To apply the force, we’ll use the AddForce() method in FixedUpdate(). All physics operations must be performed in the FixedUpdate() and not Update() because, Update will be called only per frame, which is dependent on the device it’s running on. FixedUpdate is run at fixed-rate of about 50 times a second.
Save the script and head back to unity.
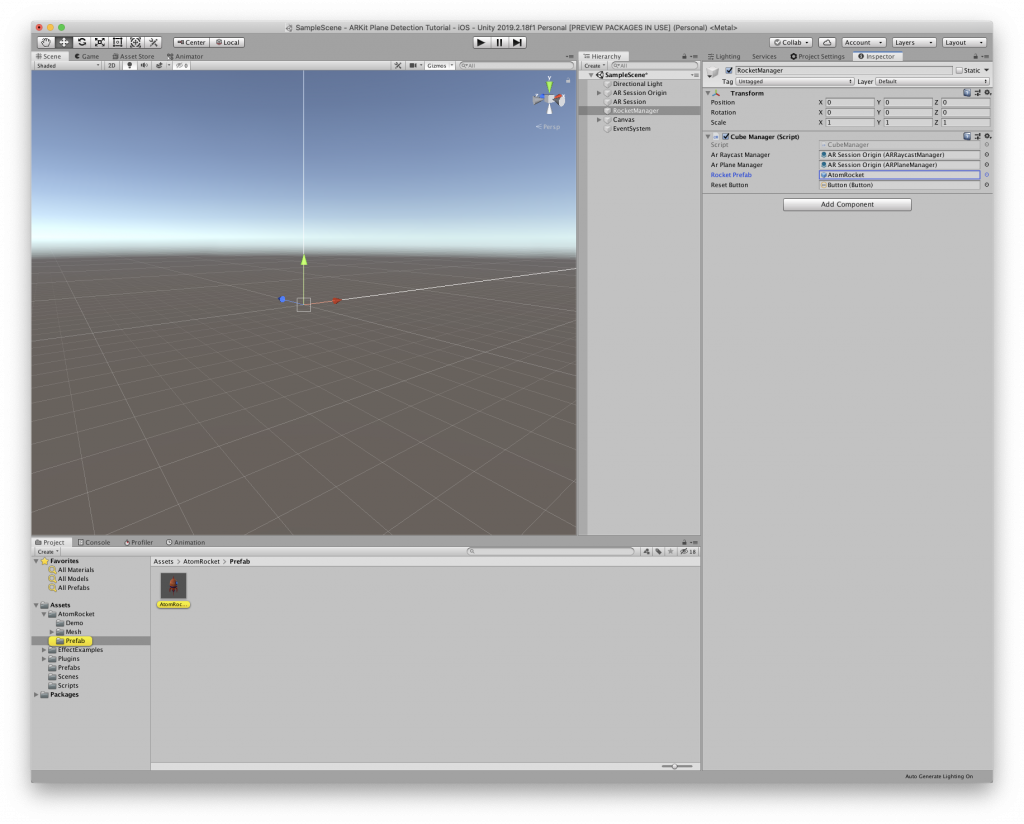
Cube Manager
We’ll modify the original CubeManager.cs to spawn the atom rocket instead as follows.
[insert code 1]
using System.Collections;
using System.Collections.Generic;
using UnityEngine;
using UnityEngine.XR.ARFoundation;
using UnityEngine.UI;

public class CubeManager : MonoBehaviour
{
    public ARRaycastManager arRaycastManager;
    public ARPlaneManager arPlaneManager;
    public GameObject rocketPrefab;
    public Button resetButton;

    private bool rocketCreated = false;
    private GameObject instantiatedRocket;

    private List<ARRaycastHit> arRaycastHits = new List<ARRaycastHit>();

    private void Awake()
    {
        resetButton.onClick.RemoveAllListeners();
        resetButton.onClick.AddListener(() =>
        {
            DeleteRocket(instantiatedRocket);
        });
    }

    void Update()
    {
        if (Input.touchCount > 0)
        {
            var touch = Input.GetTouch(0);
            if (touch.phase == TouchPhase.Ended)
            {
                if (Input.touchCount == 1)
                {
                    if (!rocketCreated)
                    {
                        //Rraycast Planes
                        if (arRaycastManager.Raycast(touch.position, arRaycastHits))
                        {
                            var pose = arRaycastHits[0].pose;
                            CreateRocket(pose.position);
                            TogglePlaneDetection(false);
                            return;
                        }
                    }
                }
            }
        }
    }

    private void CreateRocket(Vector3 position)
    {
        instantiatedRocket = Instantiate(rocketPrefab, position, Quaternion.identity);
        rocketCreated = true;
        resetButton.gameObject.SetActive(true);
    }

    private void TogglePlaneDetection(bool state)
    {
        foreach (var plane in arPlaneManager.trackables)
        {
            plane.gameObject.SetActive(state);
        }
        arPlaneManager.enabled = state;
    }


    public void DeleteRocket(GameObject cubeObject)
    {
        Destroy(cubeObject);
        resetButton.gameObject.SetActive(false);
        rocketCreated = false;
        TogglePlaneDetection(true);
    }
}
Once updated and saved. Update the references as follows for the Rocket prefab
That’s it. Now build the app and deploy it to your target device and test away!
Hi , I follow up the tutorial everything is fine but I’m afraid I miss the part when to add the e ar session origin and the cube origin
Please follow this article – http://tutorialsforar.com/creating-an-ar-app-for-ios-using-unity-and-arkit/ where I have explained how to do just that
I do not see how to create reset button! Please show me.
Thanks for your tutorial!
Great tutorial! I was wandering what if I want to spawn an entire scene, with animations an interaction with the elementes, instead of one single object, should I just put all my scene as a child of a empty prefab? thanks in advance!