Day 6 : How to use Vuforia in Unity to create AR Application
With this tutorial, you will learn how to integrate Vuforia with Unity and creating a simple Image recognition and tracking application.
This is part of a 30 day sprint where we try to publish 30 projects in 30 days, this means building full projects from scratch. Double checking the code, writing the tutorial and then posting it . If there are any typos do let us know and I hope you enjoy this tutorial and project.
Introduction
Although, we have advanced tracking and AR features with ARKit and ARCore. Sometimes we would want to do something very simple with AR. For example, detecting an image and tracking it. This is where Vuforia comes in. Vuforia with Unity provides a cross-platform AR development SDK with support for the majority of the android and iOS devices out there. Far more than what arcore and arkit support. By the sheer amount of supported devices, Vuforia outranks the rest, allowing us to add computer vision functionality that doesn’t really warrant the use of arcore or arkit.
Just like arkit and arcore, Vuforia has native engine integration with Unity. It can be found under the XR settings page. Since it is platform-independent, it can be used with virtually any platform. More info on device support here.
Image recognition and interpretation is a much-requested task and has very wide applications. You may want to identify a specific image or object and track it or interpret what is front of the smartphone camera. Common uses of Image Recognition would be augmenting printed media, marketing campaigns, gaming, and visualizing products in the environment, etc.
With this tutorial, you will learn how to integrate Vuforia with Unity and creating a simple Image recognition and tracking application. When a specific image is identified we’ll make a cylinder appear on it.
This is what we’ll be building and what the end result will look like.
Prerequisites
- Unity 2019.2.18f1
- Vuforia Engine 8.6 from here (Add Vuforia Engine to a Unity Project)
- Register with Vuforia as a developer and get your license key.
Getting Started

Download Source Code
The post will be divided into the following sections.
- Setting up Vuforia Engine with Unity.
- Creating a Vuforia enabled Scene.
- Creating Databases and Image Targets from Vuforia Dashboard
- Importing databases into our project
- Configuring the Scene
- Building and Running the Application
Setting up Vuforia with Unity
Unity 2019.2 and up comes with Vuforia native support and can be installed through the package manager. Although, to get the latest stable update, grab the latest vuforia upgrade package from the link above.
Once you have created a new project, open the downloaded package and it should prompt an import window.
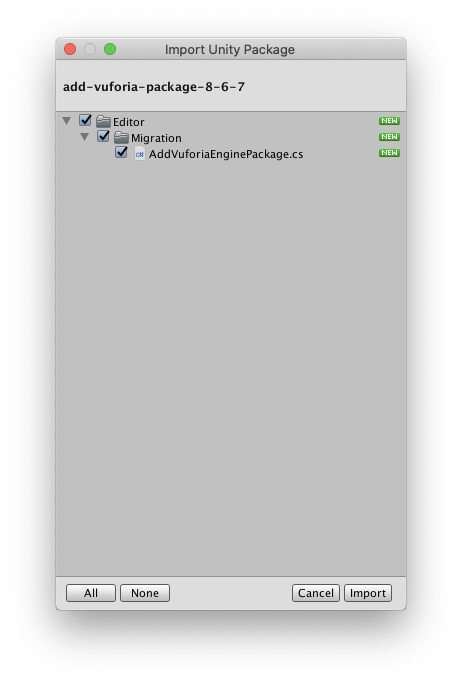
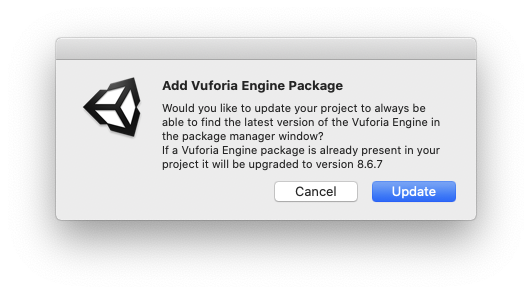
Unity will ask if you want to always have the updated vuforia engine. Click on Update.
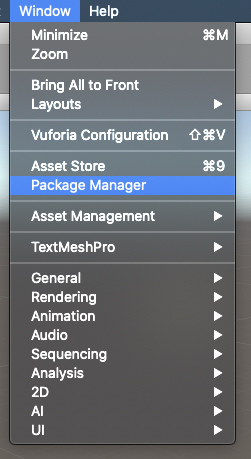
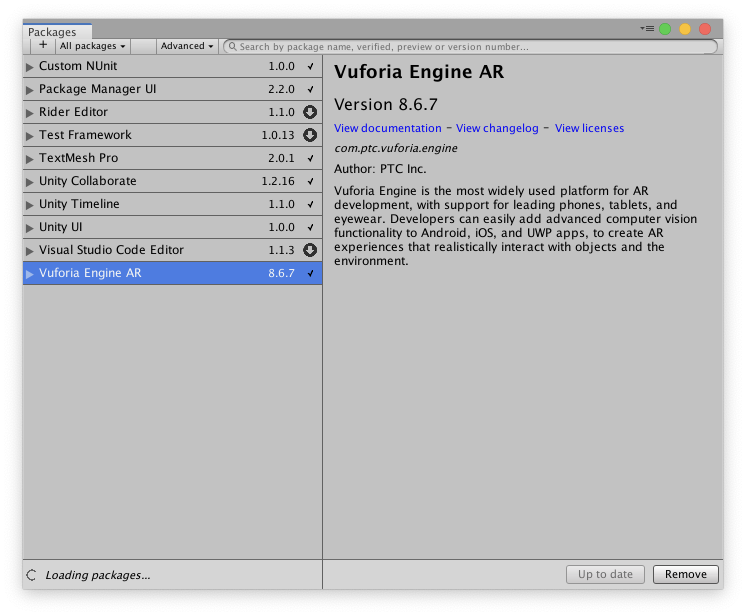
Now we go to -> Window -> Package Manager -> search for Vuforia Engine AR and install it.
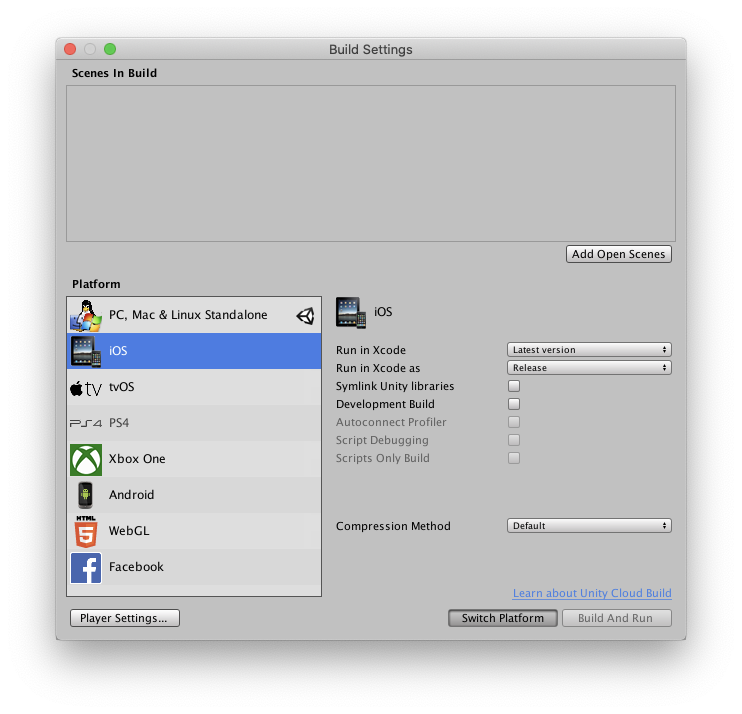
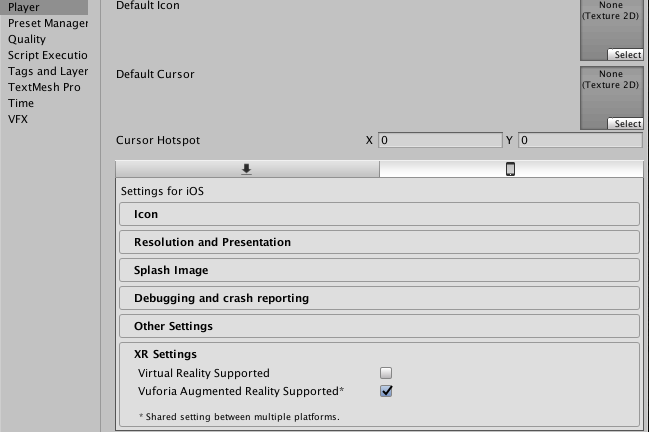
Once you have set your target platform under Build Settings, in my case I’m using iOS, go to -> Edit -> Project Settings -> Player -> XR Settings. Under that check, the Vuforia Augmented Reality Supported to true.
That’s it for the project setup. Next, let’s look at Setting up the scene.
Setting up a Vuforia Enabled Scene
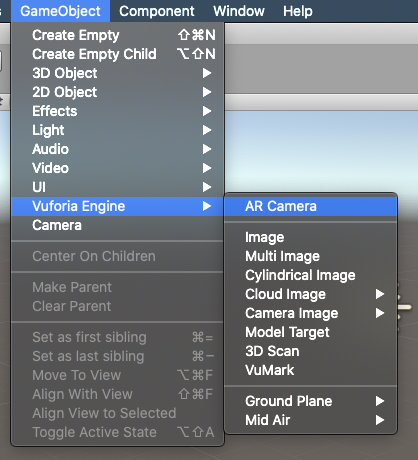
Vuforia needs its own camera setup to work, just like how we set up new Camera systems for ARkit and ARcore. Lets first delete the Main Camera gameobject from the scene Hierarchy and add a Vuforia Camera by going to Gameobject -> Vuforia Engine -> AR Camera.
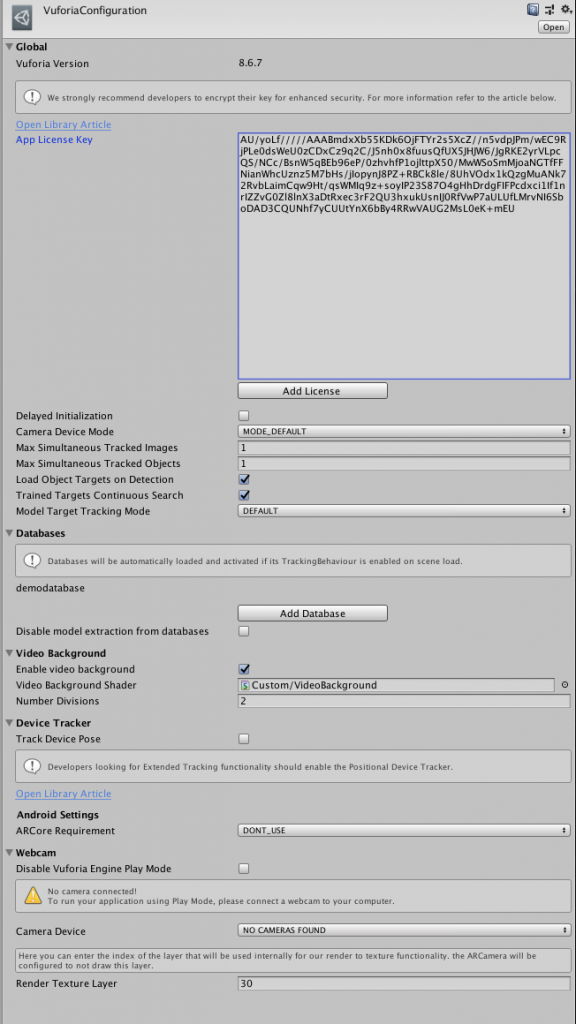
Once that’s done we need to configure our project with an app license key provided by vuforia. You can generate this license key by signing up with Vuforia as a developer. A guide on how to do that can be found here.
Once you are registered, go to the License Manager tab at the developer portal page(developer.vuforia.com) and Get Development Key. Development keys are free.
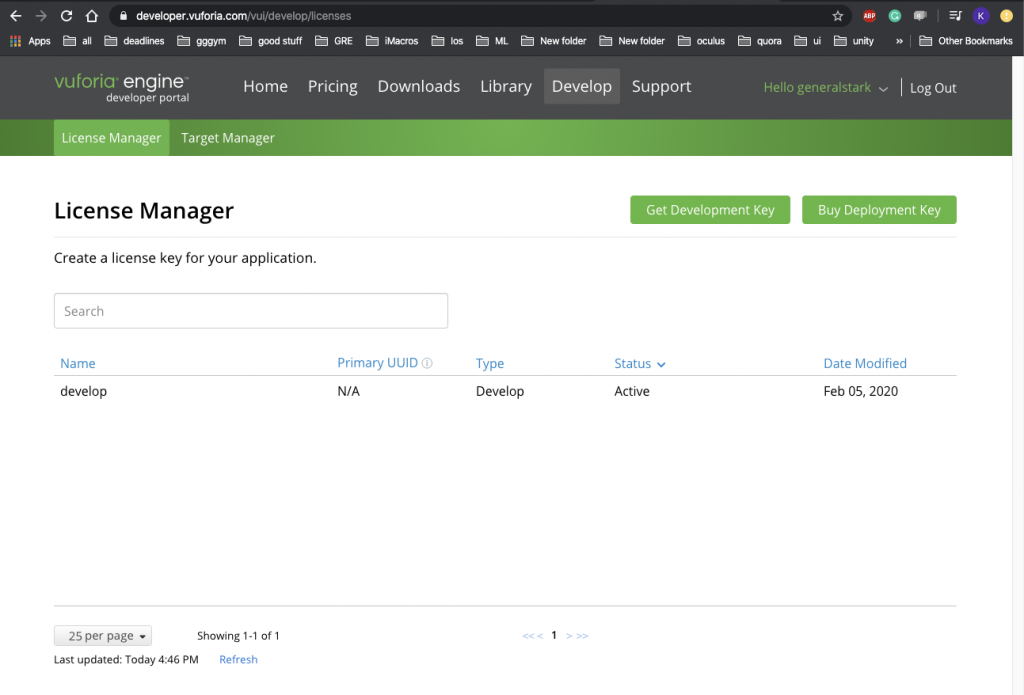
Name your key and confirm.

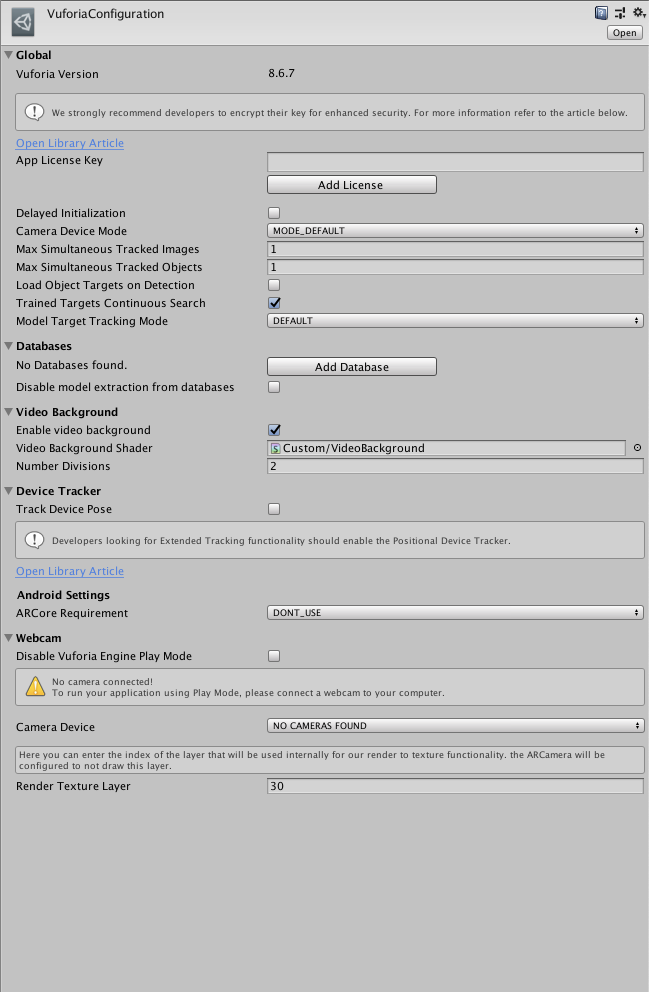
Copy the key. We will then paste this key in our Vuforia Configuration which can be found under Assets/Resources/VuforiaConfiguration in the project window. Paste it under the App License Key field.
Creating Image Targets and Databases
Since we want to perform Image recognition, we first have to tell vuforia what to detect or identify and then track it. We achieve this by defining Image Targets. Image targets represent images that the vuforia engine can detect and track. These Images can be anything, although it is ideal to have an Image with more distinct features as it vastly improves tracking of the image especially, in visually noisy environments. Once an Image in detected Vuforia can track the image as long as it is at least partially in the camera’s field of view.
A set of these Image targets will be stored as a Database. For our app we’ll be using Device targets and databases, meaning the Database will exist within our app. This works for smaller datasets, but for larger datasets, it is ideal to store this on the cloud, such are called Cloud Databases.
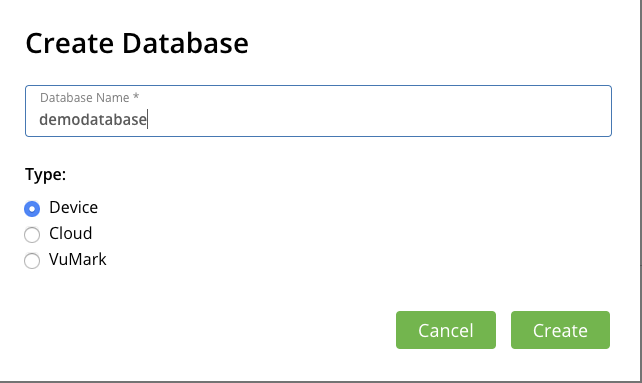
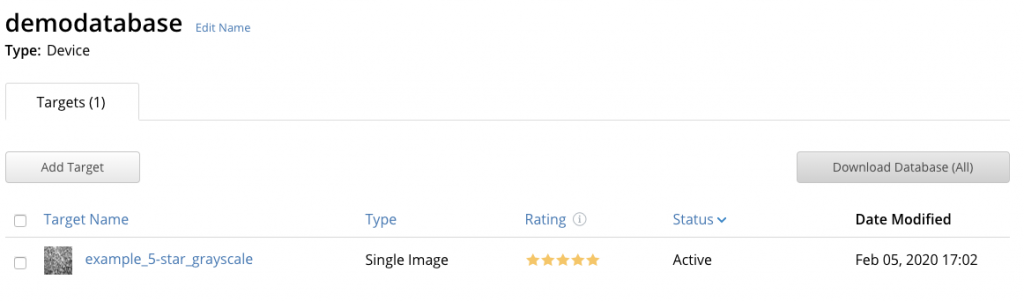
Databases and targets have to be created from the Vuforia developer portal. Navigate to the Target Manager on the portal website and create a new Database. Name it and select the type as Device.
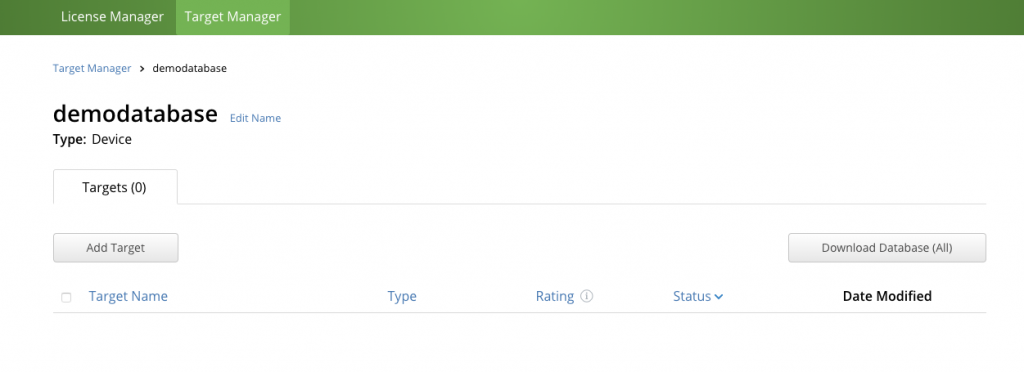
Once created open it select Add Target
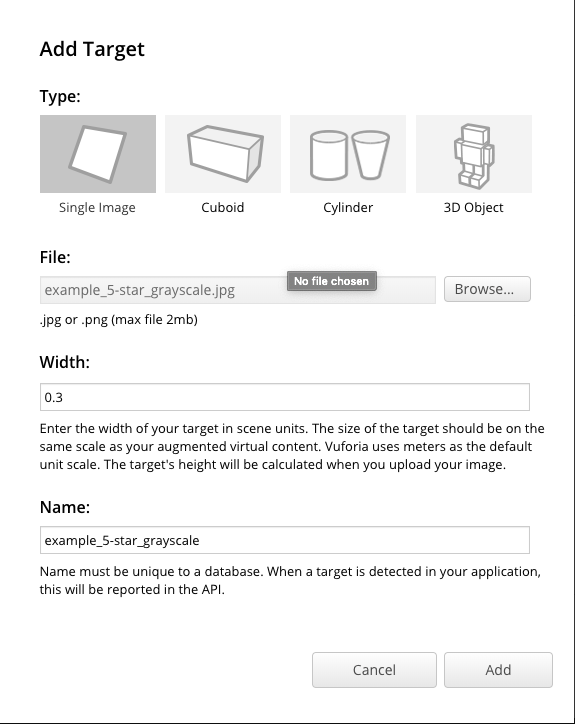
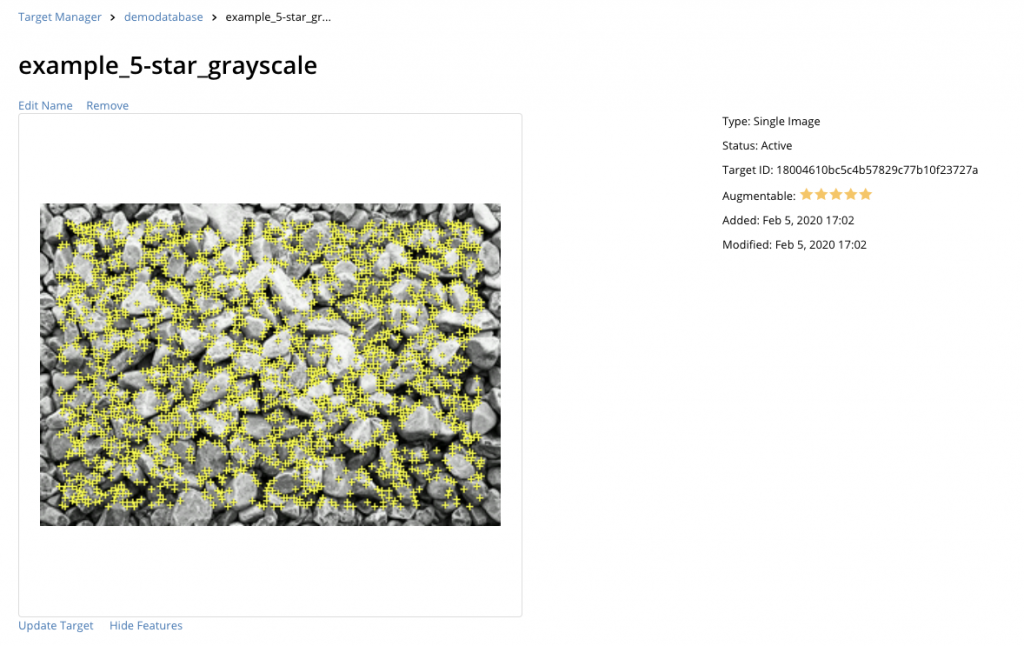
Set the type to Single Image and browse and upload your image. You can also use the demo Image I used from here. Set the width to 0.3 which defines the size of the selected image in Unity Scene Units. Finally, click Add.
Vuforia will then analyze the image and show the detected features in the selected image. As discussed earlier, the more the features, the better the identification and tracking.
Back on the selected database page, select the Database and click on Download Database
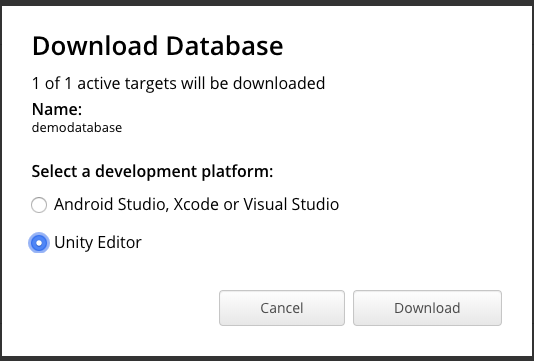
It will ask for the development platform. Select Unity Editor and click on Download.
Importing Databases into the Project
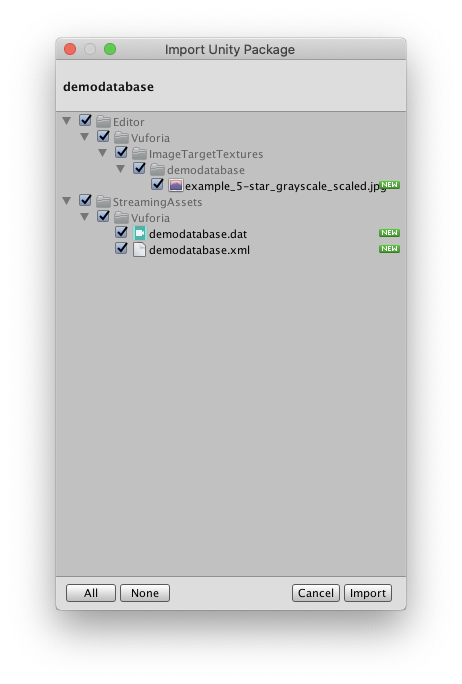
Once you have downloaded the selected Database, open it with Unity and it should open an import window and click on Import.
You can verify the database is visible under Vuforia Configuration -> Databases
Configuring Scene with Image Targets
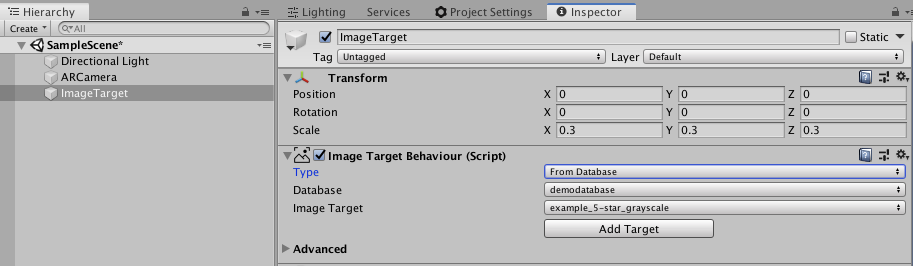
Lets now set up our Image targets within our Scene. When we create an Image target within our scene. Vuforia will look for these while running, if you have imported a database with a few image targets but they’re not configured within the scene, they will not be identified.
To create a new Image Target go to Gameobject -> Vuforia Engine -> Image.

This will create a new gameobject in the Hierarchy. Select it and it should have an Image Target Behaviour component attached to it. Set its type to From Database, Database to demodatabase (the one we just created on the developer portal), and Image target to the Image name we uploaded, generated and imported into our project.
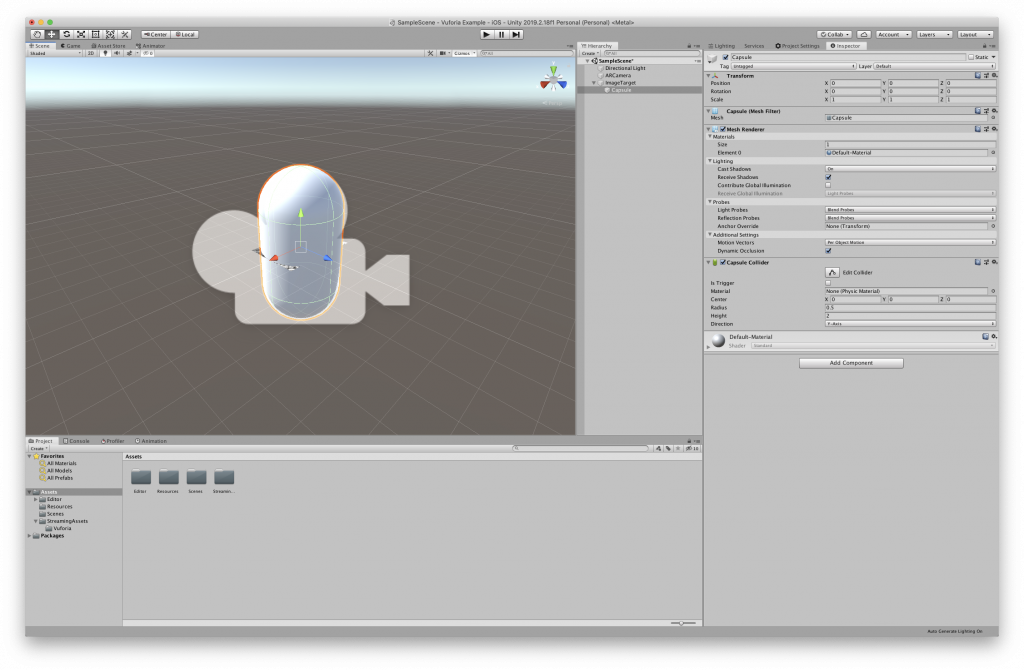
Now to spawn an object or anything else on the detected Image, we basically create the object and make it a child of the Image Target gameobject. Vuforia will disable this on start and enable/track this once the parent Image target has been identified.
I’m creating a basic Cylinder and have made it a child of the Image Target gameobject. When the Image is detected this cylinder should show up and be tracked with the Image in the real environment. I’ll be using an iPad to show the target image. You can print out the Image on a paper as well.
Building and Running the Application
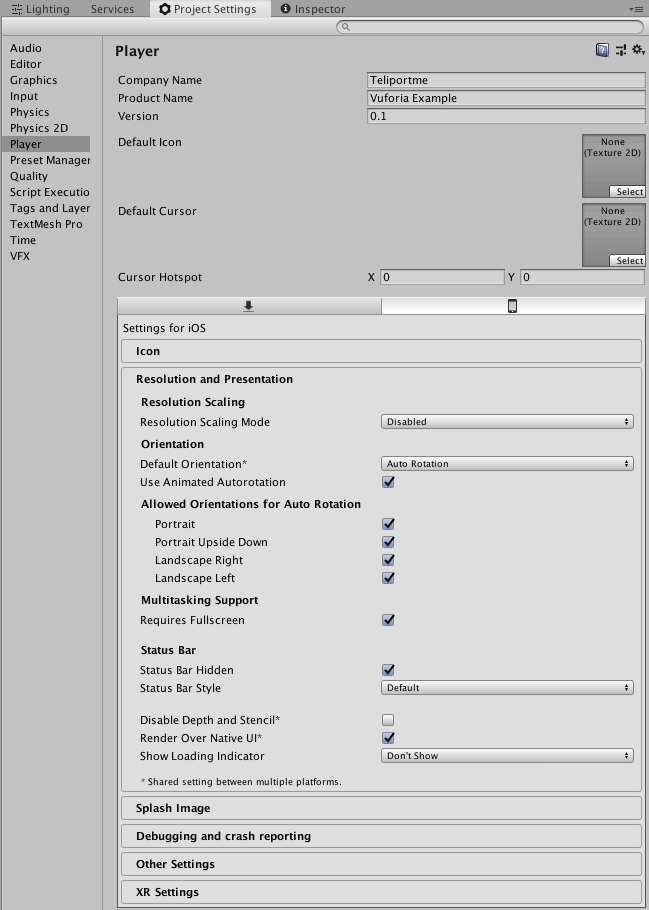
Before we build out and run the application we need to configure our player settings. Go to File -> Build Settings -> Add Open Scenes, this should add your main scene to the build.

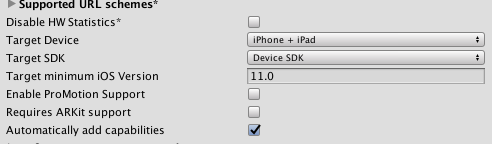
Select Player Settings and fill in the Company name, Product name, bundle identifier. In my case, I also had to Set the Target Minimum iOS version to 11.0.
Finally, we can build the app by clicking on Build & Run. Depending on the target platform, if iOS XCode will open up. Select your provisioning profile and deploy it to your device. If its android then just connect your phone and unity will install the .apk onto your device.
There we have it!
Leave a Reply