Day 10 : Creating an AR Photo Frame App using AR Foundation and Unity
In this article, we’ll be creating an AR Photo Frame experience. We’ll detect vertical planes i.e., walls and place our Picture frame on the wall. Then we’ll load an image from the gallery and augment it on our Picture frame. Cool isn’t it?
This is part of a 30 day sprint where we try to publish 30 projects in 30 days, this means building full projects from scratch. Double checking the code, writing the tutorial and then posting it . If there are any typos do let us know and I hope you enjoy this tutorial and project.
Introduction
We have been learning about AR Foundation and the implementation of its various features throughout the series of articles. If you’re new here, you can follow the articles here.
Now, it’s time to create some really cool experiences in AR! We’ll also learn new ways to manipulate the trackables through the API’s that AR Foundation offers.
This is what the end result will look like.
Getting Started
We’ll use the same project as our Placing objects on a plane article from here.
Prerequisites
- Unity 2019.2.18f1
- Understanding of C# and principles.
- iOS or an Android device.
- Article mentioned above.

Download Source Code
Implementation
The app will work as such. Once a vertical plane is detected, we can tap to spawn the AR Frame. Once the frame is created, we will pause the plane detection and hide all the planes. We can reset the plane and try again by tapping on the reset button that will show up only when the AR frame is active. To load an image on the frame, we’ll tap again on the frame itself.
Let’s go over the changes and the process.
- Scene Changes.
- Updating the cube to a frame prefab.
- Updating the CubeManager class.
- Loading Image from Gallery.
- Displaying the Image.
- Creating UI for reset
Scene and Vertical Planes
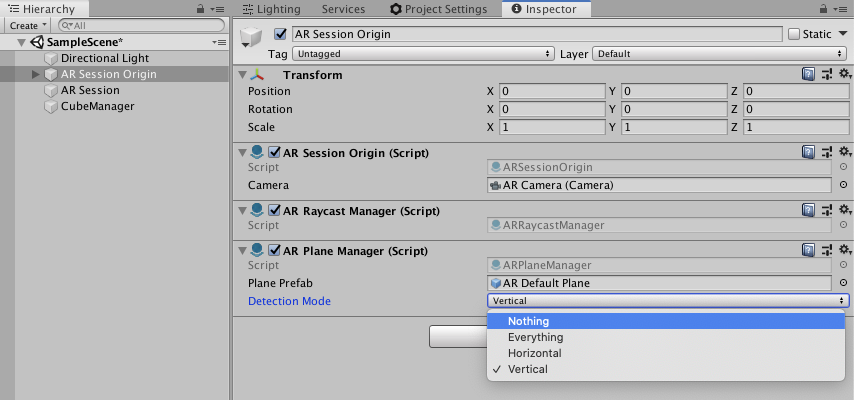
Since we only want to detect walls which are vertical, we can modify our AR Plane Manager to only identify Vertical Planes. Select the AR Session Origin gameobject and select the AR Plane Manager and update it to only Vertical Planes
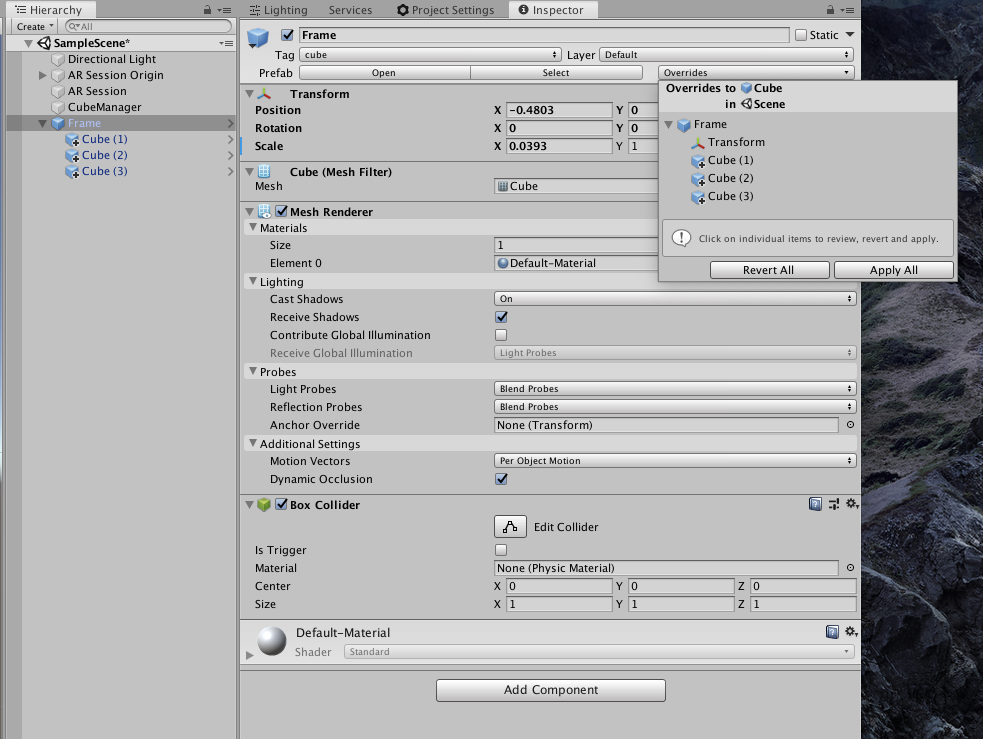
Updating the Cube to a frame prefab
You can ideally use any frame you’d like. Just make sure that the 3d model has colliders attached in unity. For this project, I made a quick white frame using some cubes. You can use this directly, make your own or import a custom 3d model.
The frame should have a Raw Image attached to which we’ll apply the image from the gallery. For this create a new raw image -> right-click in the Hierarchy -> UI -> Raw Image. Unity will also create a Canvas as its parent. Change the canvas to World space in the canvas component in the inspector and resize it accordingly. You can find the proper size for a 16:9 frame in the prefab in the source code. This RawImage should also have a collider -> Box collider.
Since we’ll be using these colliders to detect touches on the frame. Once the frame has been created, we can tap on the frame to open the Image picker dialog. To detect these touches using raycasting as we did in the cubes on planes tutorial we’ll need a collider on the RawImage.
CubeManager Class
Here’s the full script.
using System.Collections;
using System.Collections.Generic;
using UnityEngine;
using UnityEngine.XR.ARFoundation;
using UnityEngine.UI;

public class CubeManager : MonoBehaviour
{
    public ARRaycastManager arRaycastManager;
    public ARPlaneManager arPlaneManager;
    public GameObject cubePrefab;
    public Button resetButton;

    private bool frameCreated = false;
    private GameObject instantiatedFrameObject;

    private List<ARRaycastHit> arRaycastHits = new List<ARRaycastHit>();

    private void Awake()
    {
        resetButton.onClick.RemoveAllListeners();
        resetButton.onClick.AddListener(() =>
        {
            DeleteCube(instantiatedFrameObject);
        });
    }

    void Update()
    {
        if (Input.touchCount > 0)
        {
            var touch = Input.GetTouch(0);
            if (touch.phase == TouchPhase.Ended)
            {
                if (Input.touchCount == 1)
                {
                    if (!frameCreated)
                    {
                        //Rraycast Planes
                        if (arRaycastManager.Raycast(touch.position, arRaycastHits))
                        {
                            var pose = arRaycastHits[0].pose;
                            CreateCube(pose.position);
                            TogglePlaneDetection(false);
                            return;
                        }
                    }

                    Ray ray = Camera.main.ScreenPointToRay(touch.position);
                    if (Physics.Raycast(ray, out RaycastHit hit))
                    {
                        if (hit.collider.tag == "cube")
                        {
                            PickImage();
                        }
                    }
                }
            }
        }
    }

    private void CreateCube(Vector3 position)
    {
        instantiatedFrameObject = Instantiate(cubePrefab, position, Quaternion.identity);
        frameCreated = true;
        resetButton.gameObject.SetActive(true);
    }

    private void PickImage()
    {
        NativeGallery.GetImageFromGallery(HandleMediaPickCallback, "Pick Image for the AR Frame");
    }

    private void HandleMediaPickCallback(string path)
    {
        Texture2D image = NativeGallery.LoadImageAtPath(path);
        instantiatedFrameObject.GetComponentInChildren<RawImage>().texture = image;
    }

    private void TogglePlaneDetection(bool state)
    {
        foreach (var plane in arPlaneManager.trackables)
        {
            plane.gameObject.SetActive(state);
        }
        arPlaneManager.enabled = state;
    }


    public void DeleteCube(GameObject cubeObject)
    {
        Destroy(cubeObject);
        resetButton.gameObject.SetActive(false);
        frameCreated = false;
        TogglePlaneDetection(true);
    }
}
The TogglePlaneDetection method will disable plane detection and call it after we create the frame and enable it after deleting the frame. Since to enable and disable plane detection, we need the reference to the AR Plane Manager class that we’ll then assign from the ARSessionOrigin gameobject to the Cubemanager component in the Inspector.
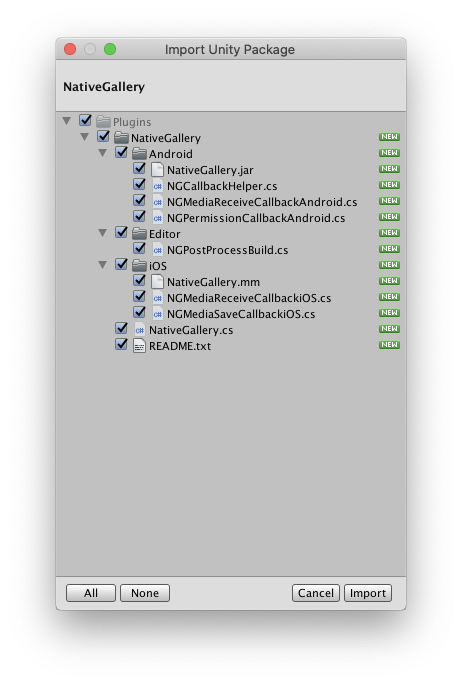
For picking an image we’ll use this awesome plugin called Native Gallery which is open source. You can grab it here.
Basically, it is a cross-platform Android and iOS API that will open the native Media Dialog picker. We’ll use this to select and load the image.
Once you’ve downloaded that, open it with unity and import it.
The PickImage method will launch the Native Gallery method that will open the Media picker. The callback then will be called which will have the path to the selected image. We can then load the image from the path into a Texture2D and apply it to the RawImage component in the HandleMediaPickCallback method.
UI
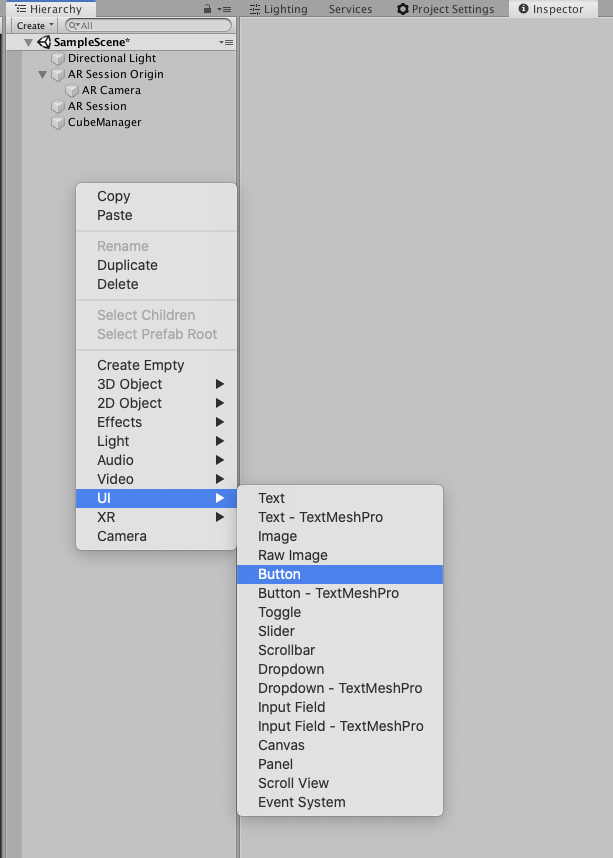
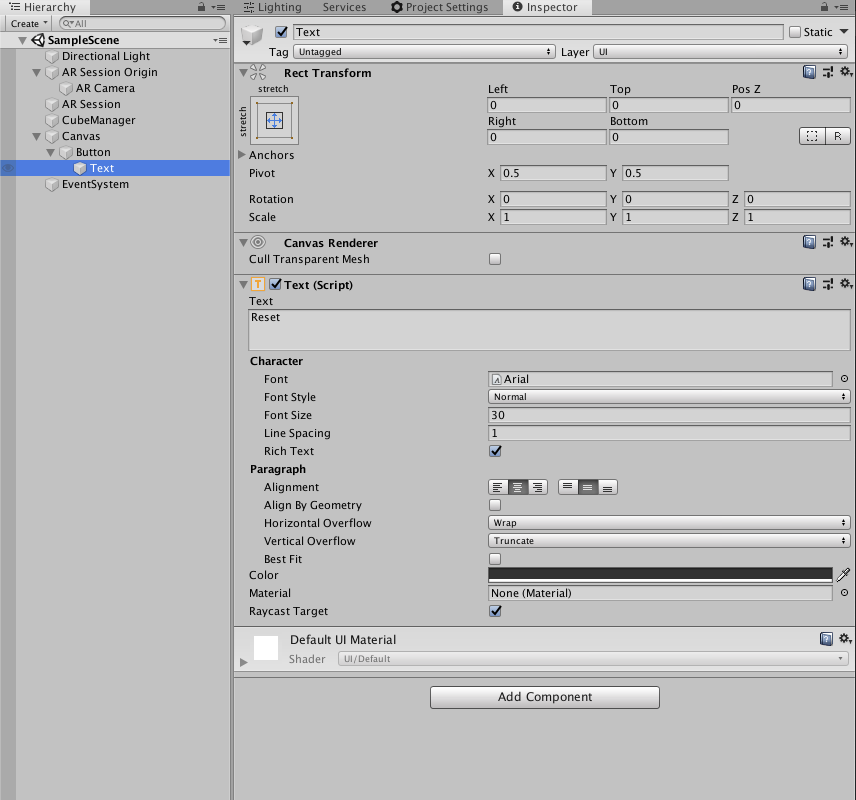
Finally, let’s create the button for the reset. Right-click in the Hierarchy -> UI -> Button. The parent canvas will also be created.
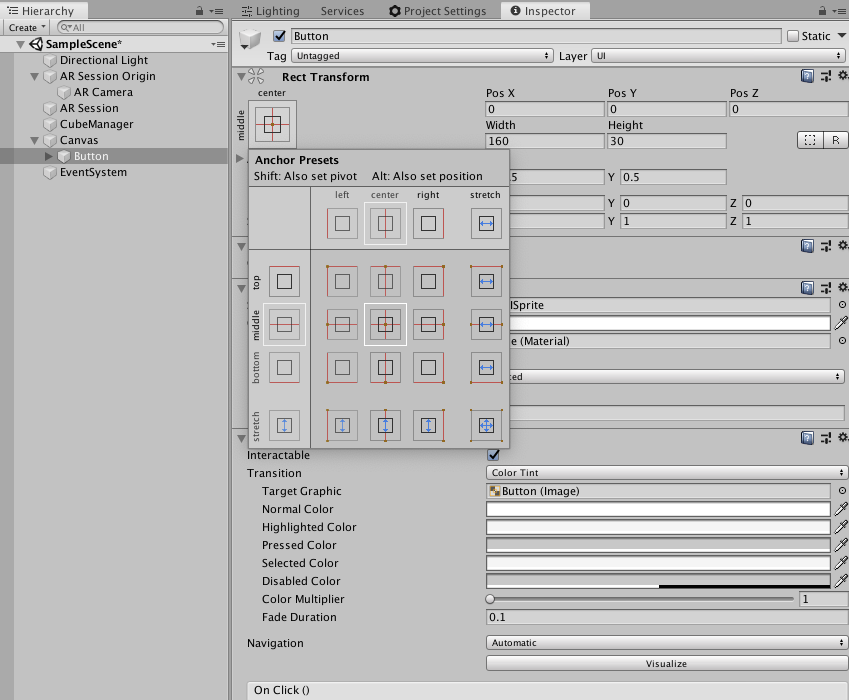
Apply the following transform values to adjust its size and anchor it to the top-bottom.
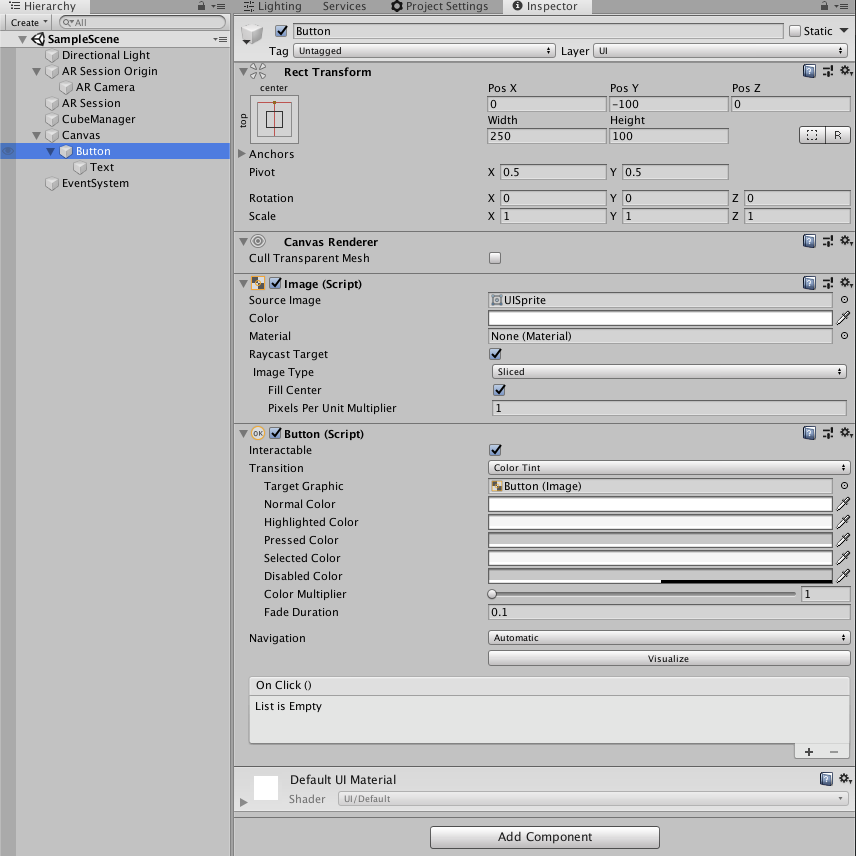
Modify the child text object content-text to “Reset”
References
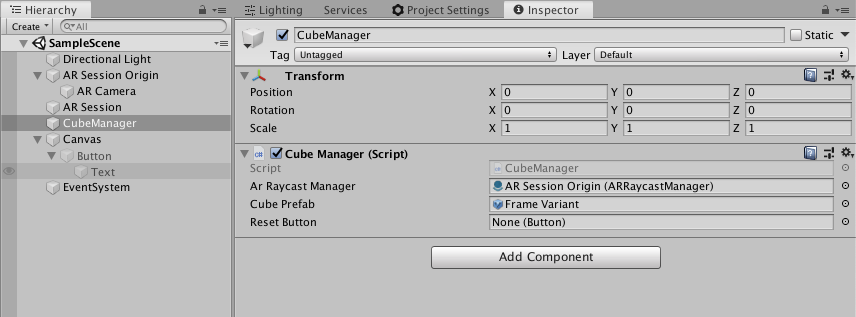
Finally, make sure all the proper references for the button and the AR Plane Manager and the AR Frame prefab are assigned to the CubeManager component.
That’s it!
Now you can build it on your Android or iOS device and play around with it yourself.
Leave a Reply