Day 18 : Creating real-time Reflections in AR using Environment Probes with Unity and ARKit.
This is part of a 30 day sprint where we try to publish 30 projects in 30 days, this means building full projects from scratch. Double checking the code, writing the tutorial and then posting it . If there are any typos do let us know and I hope you enjoy this tutorial and project.
Introduction
In a previous article here, we looked at Light Estimation to apply realistic environmental lights and shadows in our AR Scene. In this article, we’ll look at Implementing Environment Probes within Unity. Using ARFoundation to get realtime reflections from the real world and apply them in our AR Scene.
What are environment probes?
Environment probes are locations in the AR world which capture the real environments texturing and lighting information. Each probe has properties of position, scale, orientation and bounding volume. Bounding volume is the largest cuboid that will completely fit the given probe in all its axis. All these properties are defined relative to our AR Origin. If the bounding volume is very large or even infinite, the corresponding environment texture can even be used for global lighting.
The way they’re used is applying the captured real-world textures and images from the device camera and use them as Cubemaps. The texture usually is in the 360-degree image format. When this is applied to a proper material it produces generally realistic looking reflections and lighting that is being influenced by the real world.
Using Environment Probes with AR Foundation
The probes can be placed at any location that captures the environment at that location. ARFoundation and Unity provide two ways to manage the placement.
Manual
You can manually place the probes, ideally around a specific virtual object to increase the capture of environmental information around the object. This produces the most accurate results of the object’s surroundings, especially when you know where the object is going to be.
Additionally, if the object is moving, you could also place the probes along its path so the reflections of the objects are updated as it moves in realtime.
Automatic
Typically, the determination for automatic environment probe placement relies on key feature points that have been detected in the real-world environment. The methodology for making these automatic placement choices is completely in the control of the providing implementation.
Automatically placed environment probes provide a good overall set of environment information for the detected real-world features. However, manually placing environment probes at the locations of key virtual scene objects allow for improved environmental rendering quality of those important virtual objects.
XR Subsystem
The whole API for environment probes is exposed using the XR Environment probes subsystem.
In this article, we’ll set up environment probes and apply it to a sphere so we can see the reflections. Note that this only works on ARKit at the moment as ARCore lacks the support.
Getting Started
I’ll be using an earlier project where we set up AR Foundation, so if you’re not familiar with that you can follow it here. This is what the end result will look like.
Prerequisites
- Unity 2019.2.18f1.
- ARFoundation 3.0.1 with ARKit 3.0.1
Implementation
Setting up Environment Probes
Getting Environment probes into the project is fairly straightforward.
Select the AR Session Origin gameobject. Add Component -> search for AR Environment Probe Manager and add it.

We can now set the options provided. We’ll use Automatic placements with Trilinear filtering and HDR Textures. You can read more about texture filtering here.
Setting up Objets for Reflection.
Basically, unity will create reflection probes around the scene automatically. These reflection probes will affect the properties of the materials of the objects placed in the scene.
First, create a new sphere and a material with a standard shader.
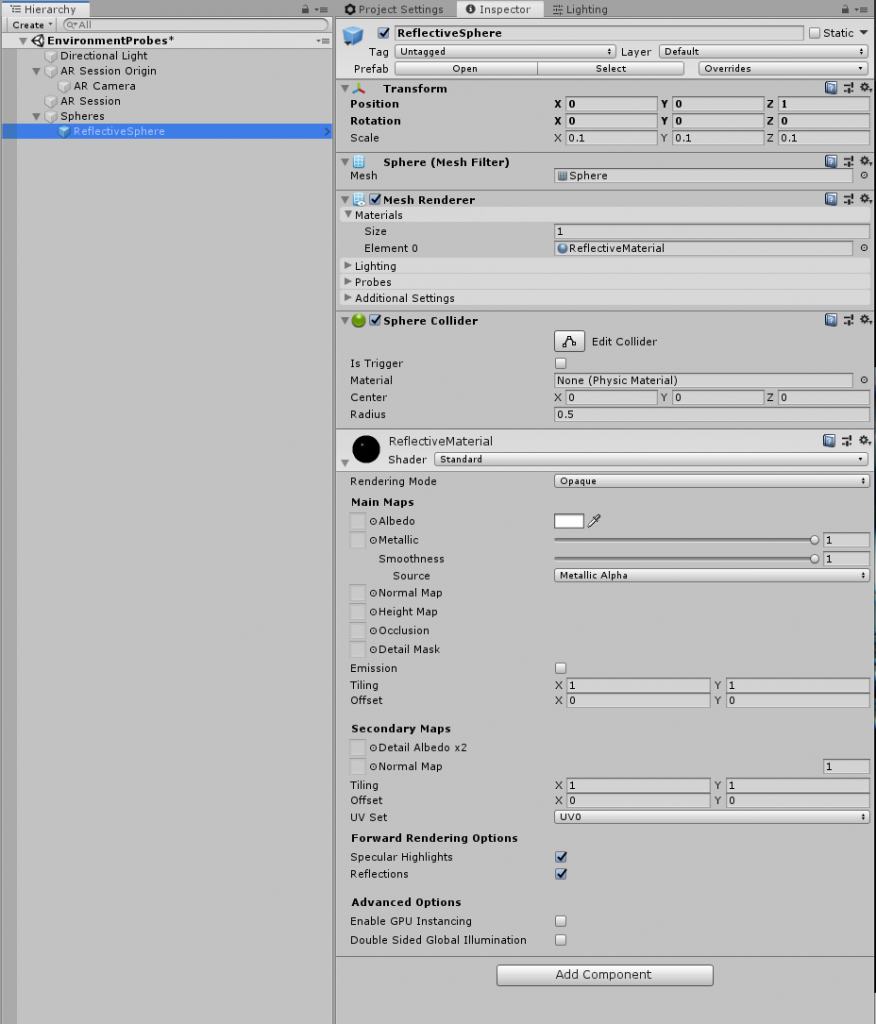
If you notice in the material properties –

We have set the metallic and smoothness property to 1. And the source as Metallic alpha. This means the sphere will not look like a smooth metal sphere.
Further down, in the Forward Rendering Options, Specular highlights and reflections are turned on. This is what allows this object to receive the reflections from the Reflection probes that will be placed by the AR Environment Probe Manager.
Initially, the sphere will be black but will start showing reflections once the probes are created by ARKit.
That’s it!
Now you can build the app and test it on your iOS device.

Leave a Reply