Day 17 : Creating a Solar System in AR using Unity and AR Foundation
In today’s article, we’ll be creating the solar system in AR with 5 planets. We have been covering all the AR-related topics to get you started with development for AR using Unity. You can find the whole series here.
This is part of a 30 day sprint where we try to publish 30 projects in 30 days, this means building full projects from scratch. Double checking the code, writing the tutorial and then posting it . If there are any typos do let us know and I hope you enjoy this tutorial and project.
Getting Started
I’ll be using the ARFoundation template that we set up in an earlier tutorial from here. Make sure to follow that and set it up if you want to follow along.
We’ll set up a sun using particle systems and have Mercury, Venus, Earth, Mars, and Jupiter around the sun orbiting at distances. The distances and sizes are going to be non-realistic. This is because if we were to scale down the real scale of the solar system Jupiter would be about 500m away which you won’t even be able to see in AR.
This will run on both Android and iOS. I’ll be using an iPhone for the article though.
Here is what the end result is going to look like
Prerequisites
- Unity 2019.2.18f1.
- ARFoundation setup from an earlier article here.
Implementation
Sun
To create our sun we’ll use the default particle system. Right-click in the Hierarchy and create a new particle system -> Effects -> Particle system.
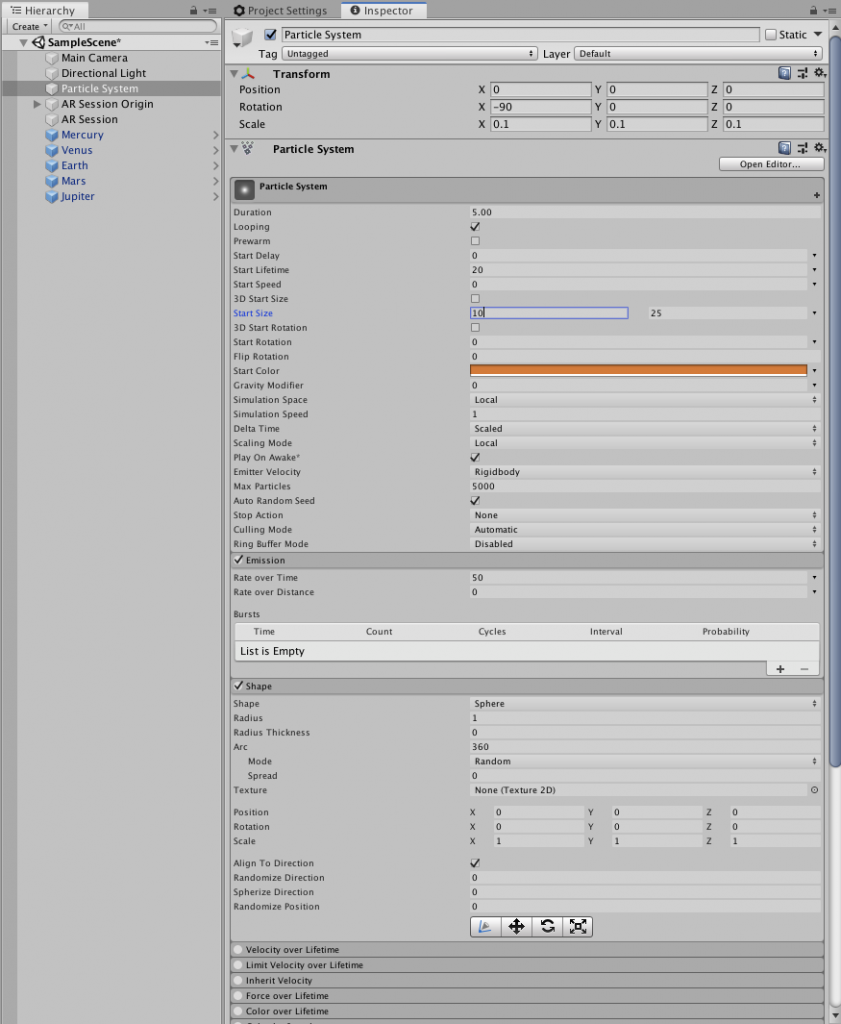
Set its start size to random between two values of 10 and 25.
Set its start color to orange and the emission and shape properties as follows.
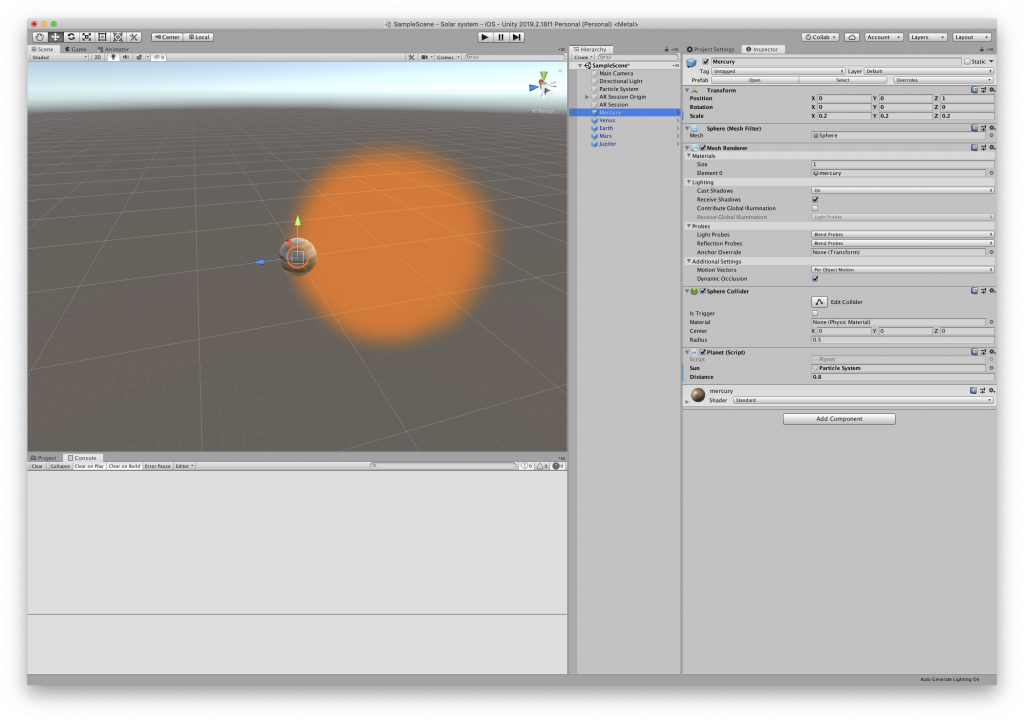
This is what the sun effect should look like now
Planets
Let’s create a script that will make the planets rotate at an orbit with a distance. Create a new script called Planet.cs and open it with Visual Studio.
This is the whole script.
using System.Collections;
using System.Collections.Generic;
using UnityEngine;

public class Planet : MonoBehaviour
{
    public GameObject sun;
    public float distance;

    private void Start()
    {
        //adjust distance
        transform.position = (transform.position - sun.transform.position).normalized * distance + sun.transform.position;
    }

    void Update()
    {
        if(sun != null)
        {
            //Orbit at distance
            transform.RotateAround(sun.transform.position, Vector3.up, 5 * Time.deltaTime);
        }
    }
}
In the start() method we’ll set the distance of the planet from the sun which will be the orbit radius.
In the update() method we’ll use the RotateAround() method to make the planet orbit around the Sun in its positive Y-axis.
Save this script and head to unity.
Creating Planets
The way we’re going to create the planets is we’ll create a 3D sphere and apply planet textures onto them. The source has the textures under the Textures folder.
We’ll use two types of textures. An albedo main texture that has all the details and a bump map. We will then create a new material with a standard shader and assign these textures. This material will then be assigned to our sphere object creating a planet. We’ll do this for all of our five planets.
Create a new Sphere gameobject -> 3D -> sphere in the Hierarchy.
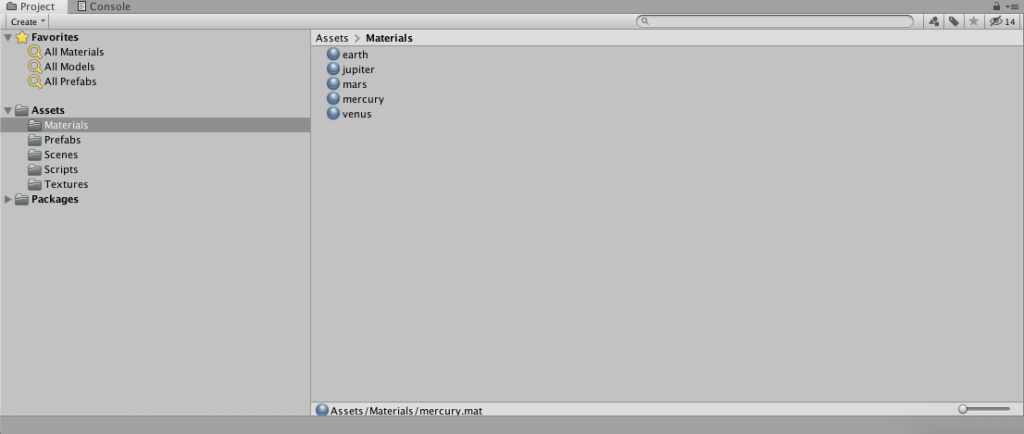
Create a new Material named Mercury and drag and drop the main texture into the albedo component and the bumpmap into the Normal Map component.
Create materials for all the planets.
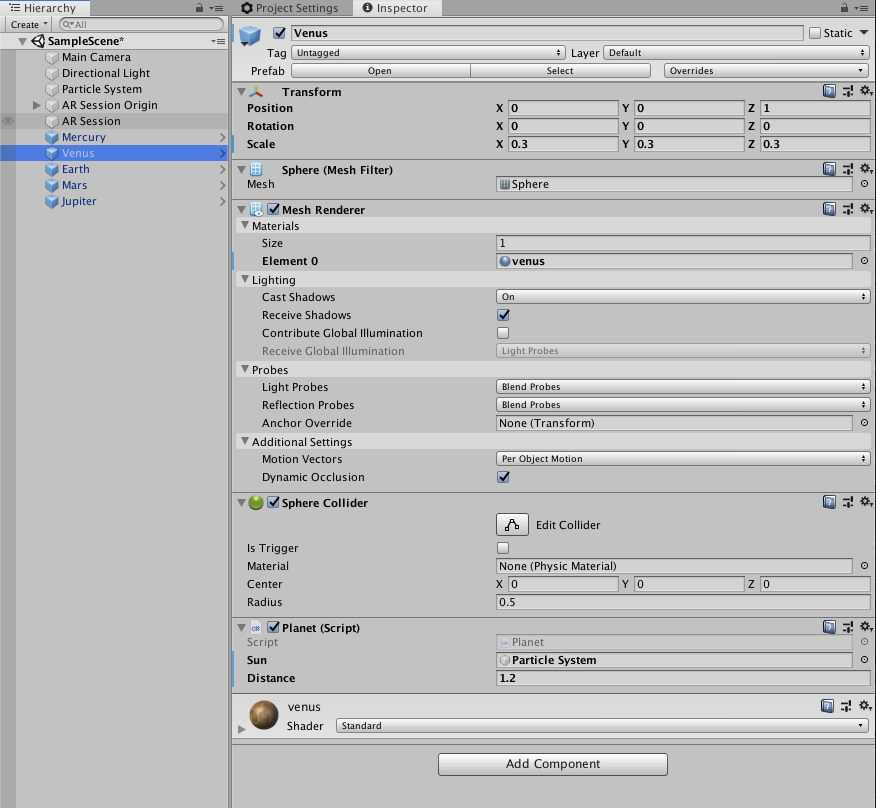
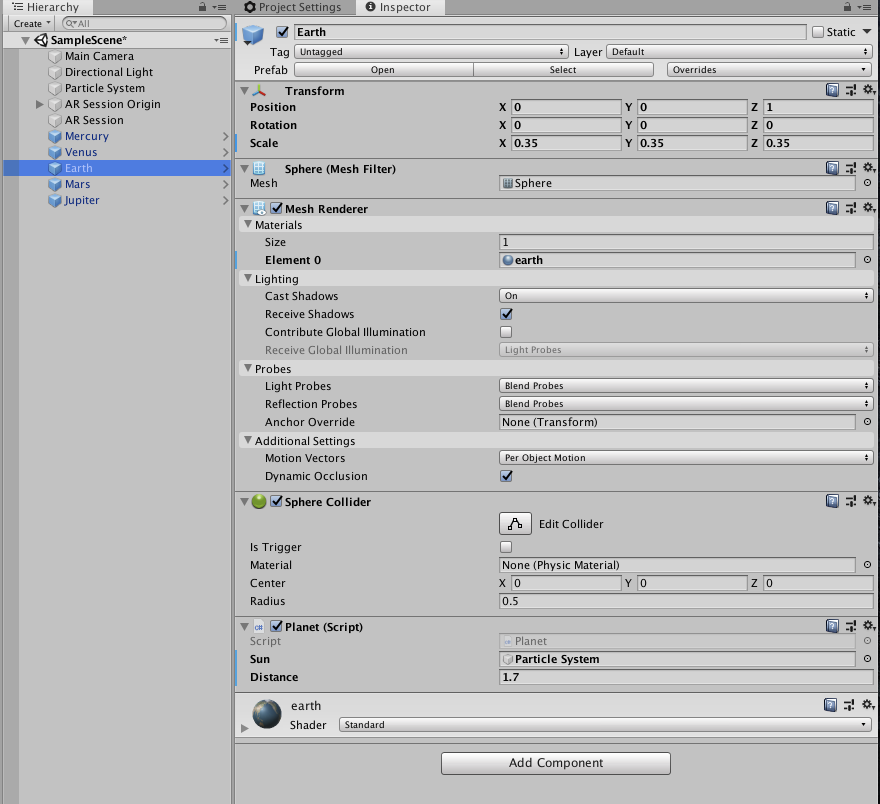
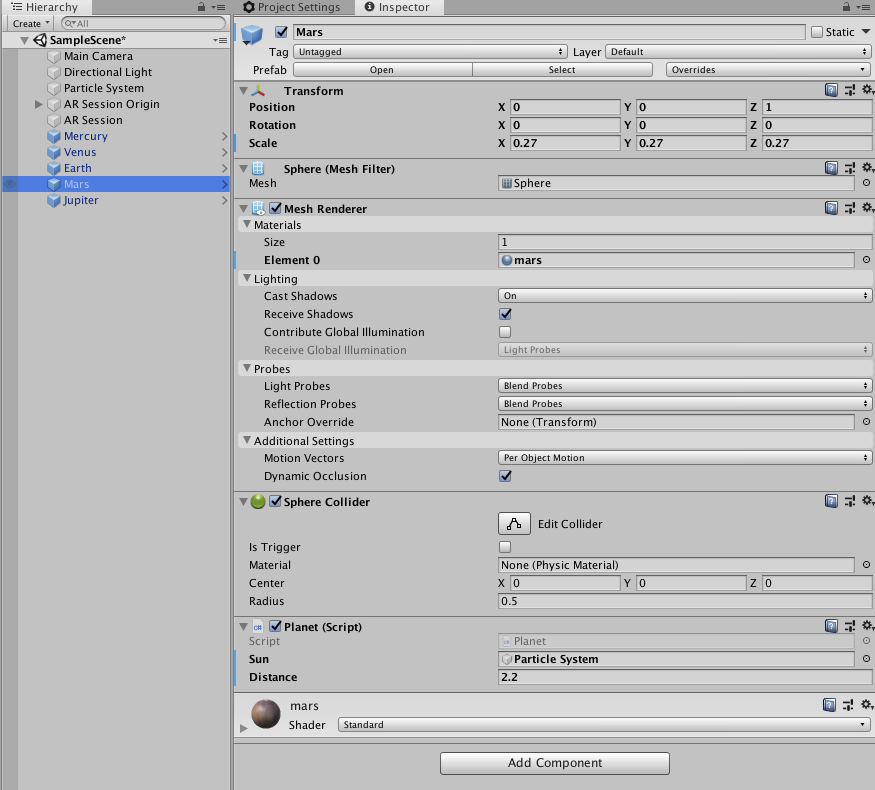
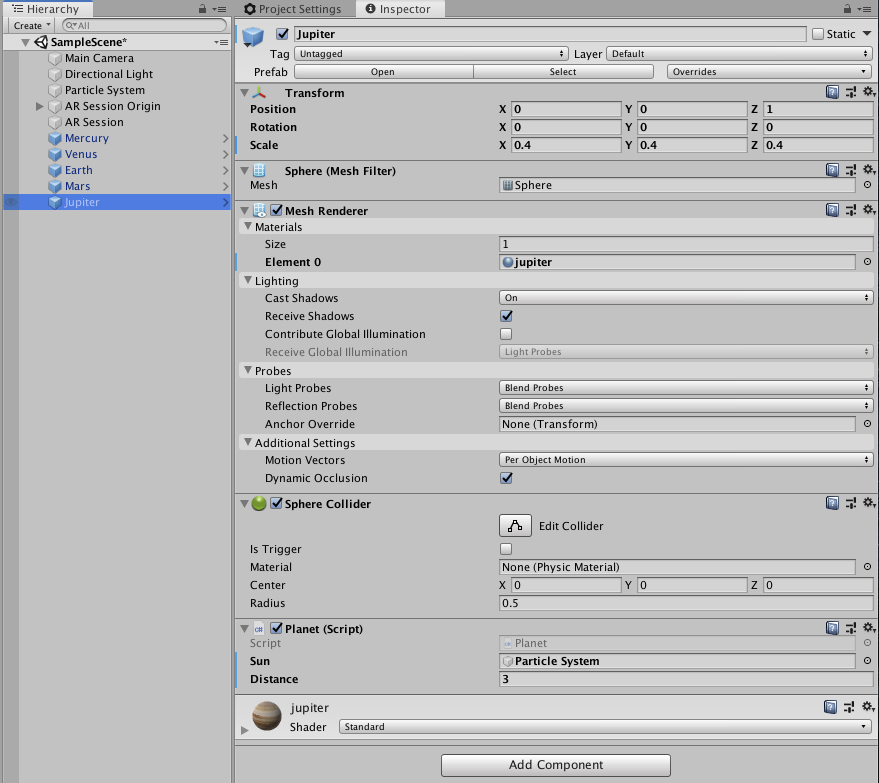
Now in the Hierarchy name the planet to Mercury and set its transform position to 0,0,1. This is so that the normalization that we do in the Planet Script doesn’t return 0.
Now assign the created material to the Mesh Renderer component -> Material 0 property.
Finally, add the Planet Script in the Inspector to this gameobject and set the distance to 0.8. Assign the particle system that we created as the Sun property to the script.
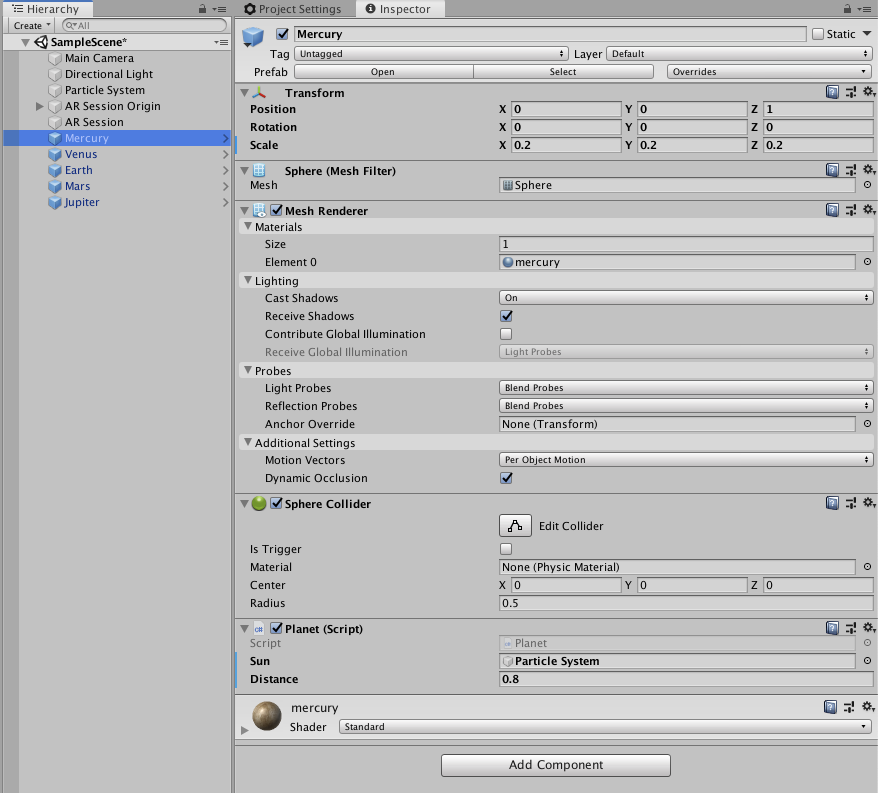
Similarly, create more planets and assign their properties, sun and distance property of the Planets script accordingly.
That’s it.
Now you can build the app and test on your target device.
Please comment below with your queries and feedback and I will reply as soon as possible.

Leave a Reply