Day 12 : Create an AR Compass app using AR Foundation and Unity.
In this article, we will create an Augmented Reality Compass application using AR Foundation and Unity. We’ll be placing our AR Compass Marker right underneath us. The compass will point and turn with our phone and display the true heading in degrees and the cardinal direction. You can also use this with plane detection.
This is part of a 30 day sprint where we try to publish 30 projects in 30 days, this means building full projects from scratch. Double checking the code, writing the tutorial and then posting it . If there are any typos do let us know and I hope you enjoy this tutorial and project.
Introduction
In this article, we will create an Augmented Reality Compass application using AR Foundation and Unity.
We’ll be placing our AR Compass Marker right underneath us. The compass will point and turn with our phone and display the true heading in degrees and the cardinal direction. You can also use this with plane detection.
You can follow the other articles in the AR learning series where we have set up Unity with AR Foundation for universal cross-platform android and ios apps with Plane Detection here.
This is what the end result will look like
Getting Started
This app will work on both android and iOS, although i’ll be using an ios device. Since unity provides unified APIs for both hardware, we’ll be using the Compass Scripting API.
Pre-requisites
- Unity 2019.2.18f1
- C# skills
- Previous articles from here.
Implementation
Compass Prefab
The first is to create a new compass prefab that we’ll use to spawn on the tap. In the previous articles we have used Cubes, frames, and rockets. In the same way, we’ll create a new Compass prefab.
The object will be made from a 2D image, which will be imported as a sprite. We will then place this sprite in our scene as a 3d object.
You can download the image I have used from here. Once downloaded, copy or drag and drop it into your project.
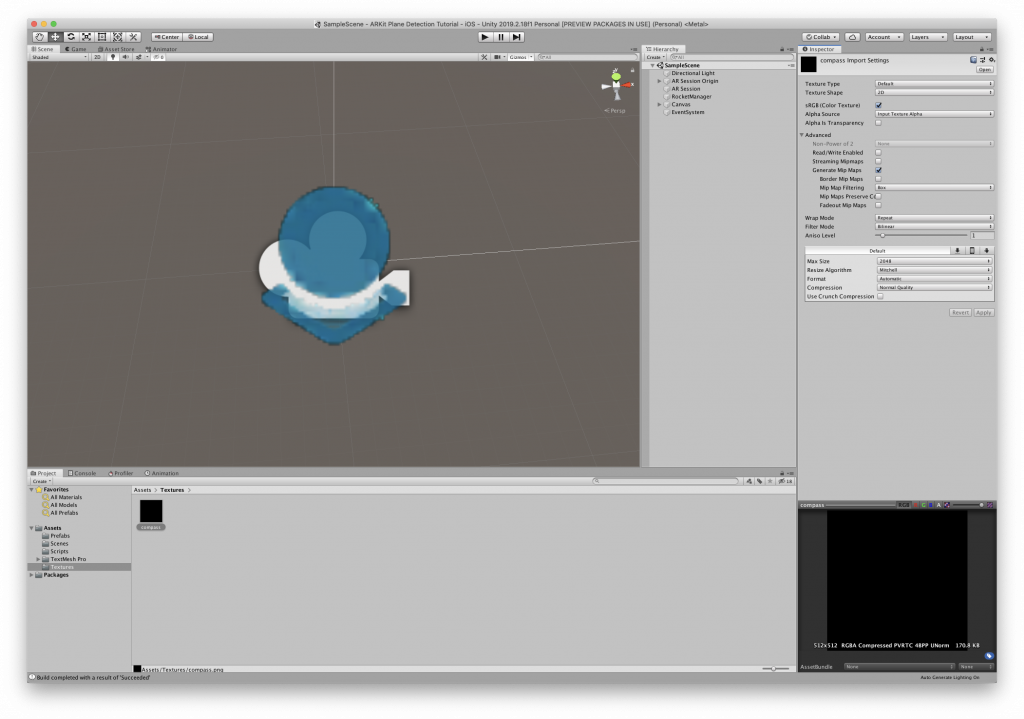
Now, select the image in the project and set its import settings to 2D and UI Sprite. This will mark the image as a sprite within unity.

Create a new Prefab by creating an empty gameobject and dragging it into the project view under the prefabs folder.
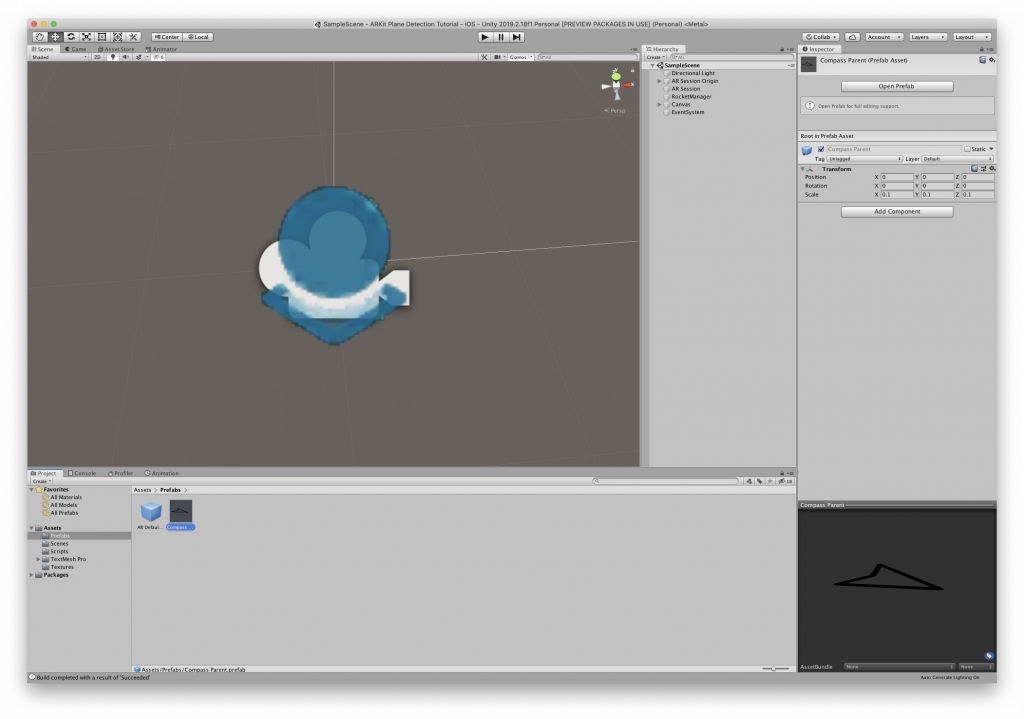
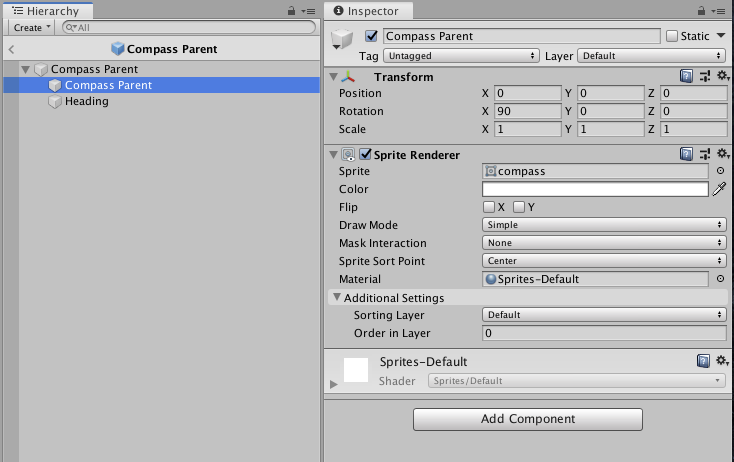
Name it Compass parent. We will child our sprite to this with a horizontal angle
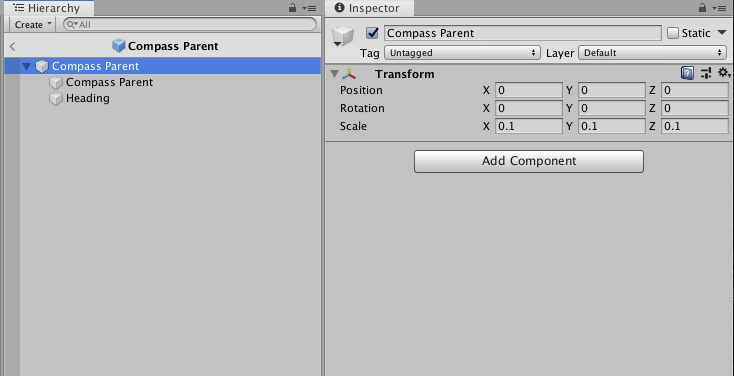
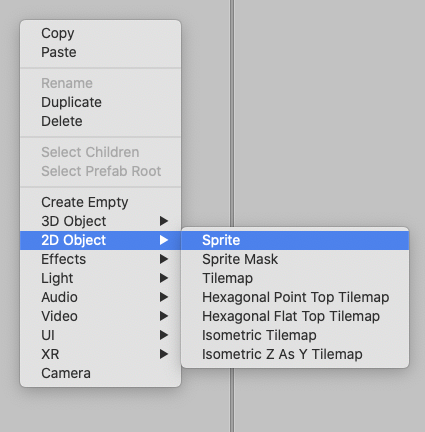
Now create a child sprite by right-clicking in the Hierarchy -> 2D -> Sprite
Assign the imported compass sprite to its sprite property.
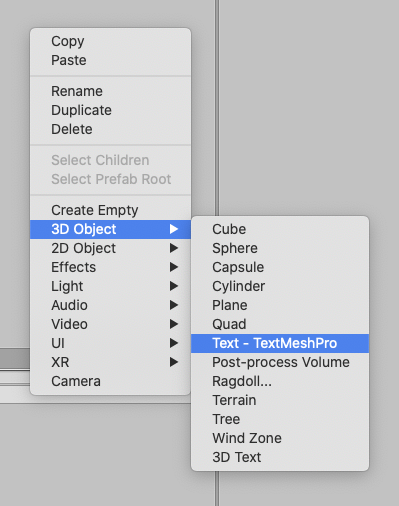
Finally, let’s add a TextMeshPro 3D text to display the heading. Right-click -> 3D -> Text – TextMeshPro
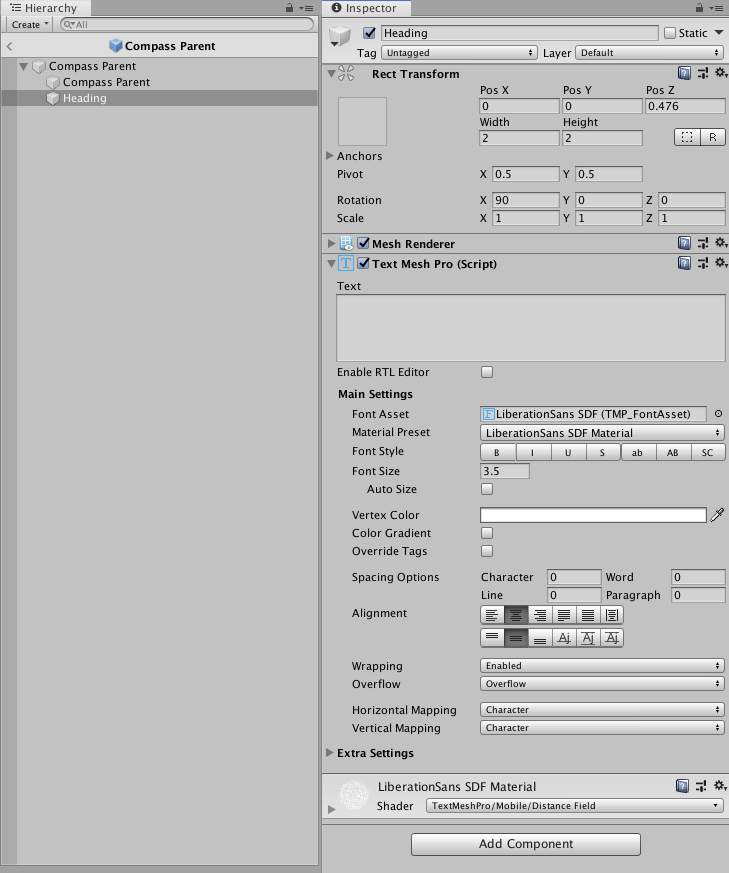
Set its properties as follows
Compass Behaviour
We will write the compass behavior script. We’ll be using the compass API. You can read more about the API here from unity itself.
Let’s add a script to our Compass prefab by Add Component in the Inspector and type in CompassBehaviour and Create and Add.
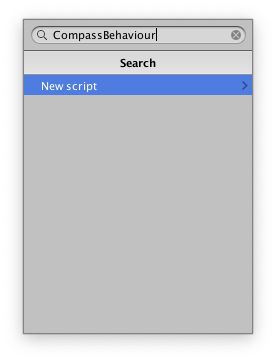
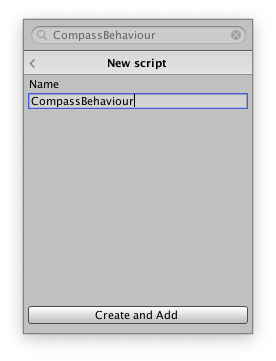
Open up the script with visual studio.
This is the complete script.
[insert script]
using System.Collections;
using System.Collections.Generic;
using UnityEngine;
using TMPro;
using System;

public class CompassBehaviour : MonoBehaviour
{
    public TextMeshPro headingText;

    private bool startTracking = false;

    void Start()
    {
        Input.compass.enabled = true;
        Input.location.Start();
        StartCoroutine(InitializeCompass());
    }

    void Update()
    {
        if (startTracking)
        {
            transform.rotation = Quaternion.Euler(0, Input.compass.trueHeading, 0);
            headingText.text = ((int)Input.compass.trueHeading).ToString() + "° " + DegreesToCardinalDetailed(Input.compass.trueHeading);
        }
    }

    IEnumerator InitializeCompass()
    {
        yield return new WaitForSeconds(1f);
        startTracking |= Input.compass.enabled;
    }

    private static string DegreesToCardinalDetailed(double degrees)
    {
        string[] caridnals = { "N", "NNE", "NE", "ENE", "E", "ESE", "SE", "SSE", "S", "SSW", "SW", "WSW", "W", "WNW", "NW", "NNW", "N" };
        return caridnals[(int)Math.Round(((double)degrees * 10 % 3600) / 225)];
    }
}
First in the start method, we have to enable the compass and start the location service which are required for the compass device to work fully.
Since sometimes, it takes a few milliseconds for the compass device to be fully activated. So we’ll write a coroutine and wait a general 1 second before we start tracking. We set the start tracking to true once we have verified the compass is indeed enabled.
Then in the update, we fetch the Input.compass.trueheading property and apply it to the y-axis of our compass prefab.
We also have a utility method that will return the cardinal direction of the heading based on it. Which we then finally display onto our HeadingText.
Save the script and return to unity.
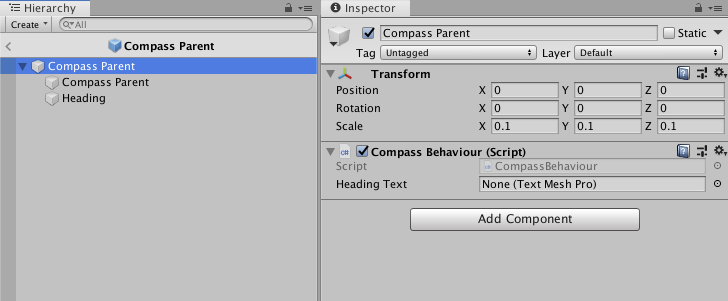
Make sure the HeadingText reference is assigned properly.
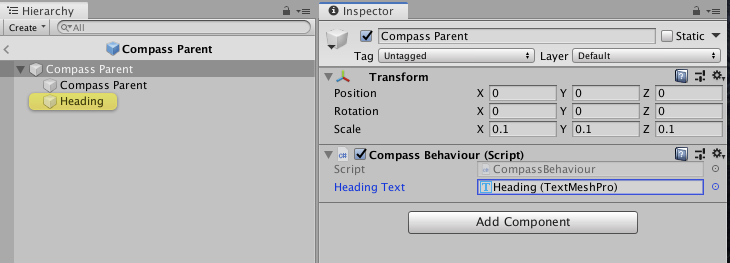
Creating the Compass Manager.
Next, we will write the behavior for creating the compass on tap.
Here’s the full script.
using System.Collections;
using System.Collections.Generic;
using UnityEngine;
using UnityEngine.XR.ARFoundation;
using UnityEngine.UI;
using TMPro;
using UnityEngine.EventSystems;

public class CubeManager : MonoBehaviour
{
    public ARRaycastManager arRaycastManager;
    public ARPlaneManager arPlaneManager;
    public GameObject rocketPrefab;
    public Button resetButton;

    private bool rocketCreated = false;
    private GameObject instantiatedRocket;

    private List<ARRaycastHit> arRaycastHits = new List<ARRaycastHit>();

    private void Awake()
    {
        resetButton.onClick.RemoveAllListeners();
        resetButton.onClick.AddListener(() =>
        {
            DeleteRocket(instantiatedRocket);
        });
    }

    void Update()
    {
        if (Input.touchCount > 0)
        {
            var touch = Input.GetTouch(0);
            if (!EventSystem.current.IsPointerOverGameObject(touch.fingerId))
            {
                if (touch.phase == TouchPhase.Ended)
                {
                    if (Input.touchCount == 1)
                    {
                        if (!rocketCreated)
                        {
                            //Rraycast Planes
                            if (arRaycastManager.Raycast(touch.position, arRaycastHits))
                            {
                                var pose = arRaycastHits[0].pose;
                                //CreateRocket(pose.position);
                                Vector3 spawnPos = Camera.main.transform.position;
                                spawnPos.y = spawnPos.y - 1f;
                                CreateRocket(spawnPos);
                                TogglePlaneDetection(false);
                                return;
                            }
                        }
                    }
                }
            }
        }
    }

    private void CreateRocket(Vector3 position)
    {
        instantiatedRocket = Instantiate(rocketPrefab, position, Quaternion.identity);
        rocketCreated = true;
        resetButton.gameObject.SetActive(true);
    }

    private void TogglePlaneDetection(bool state)
    {
        foreach (var plane in arPlaneManager.trackables)
        {
            plane.gameObject.SetActive(state);
        }
        arPlaneManager.enabled = state;
    }


    public void DeleteRocket(GameObject cubeObject)
    {
        Destroy(cubeObject);
        resetButton.gameObject.SetActive(false);
        rocketCreated = false;
        TogglePlaneDetection(true);
    }
}
On touch, we will spawn the compass prefab right under the camera’s position about 1 unit under. This makes it so that the compass looks like its right at our feet.
Save the script and head back to unity.
Assign the proper compass.prefab reference.
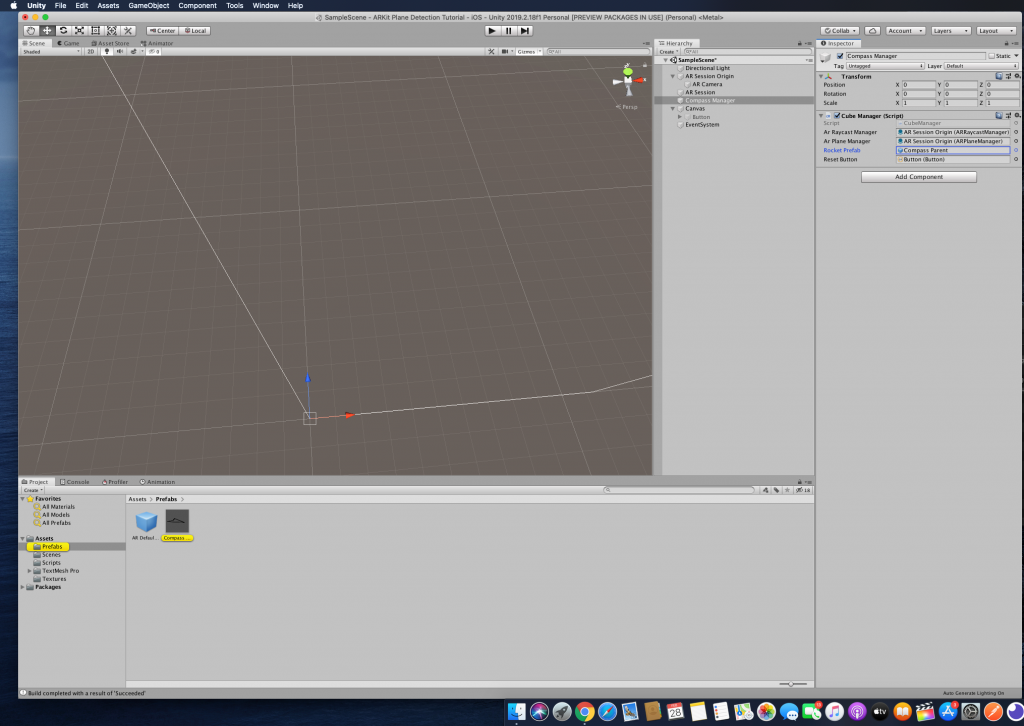
That’s about it!
Now just save your scene, build the project and deploy it onto your device.
Please leave any queries or feedback in the comments section below.

Leave a Reply